No edit summary Tag: rte-source |
Tag: Source edit |
||
| (31 intermediate revisions by 10 users not shown) | |||
| Line 2: | Line 2: | ||
|imagebg=#FFF |
|imagebg=#FFF |
||
|name=[[File:Z4IconZeroKnuckle.png|left|Z]] [[File:Z4IconZeroKnuckle.png|right|Z]] Zero Knuckle |
|name=[[File:Z4IconZeroKnuckle.png|left|Z]] [[File:Z4IconZeroKnuckle.png|right|Z]] Zero Knuckle |
||
| − | |image=[[File: |
+ | |image=[[File:MMZ4 Zero (Zero Knuckle).jpg|200px|Zero Knuckle]] |
| + | |at= |
||
|appearances=[[Mega Man Zero 4]] |
|appearances=[[Mega Man Zero 4]] |
||
}} |
}} |
||
| − | The {{Nihongo|'''Zero Knuckle'''|ゼロナックル|Zero Nakkuru}} is a weapon [[ |
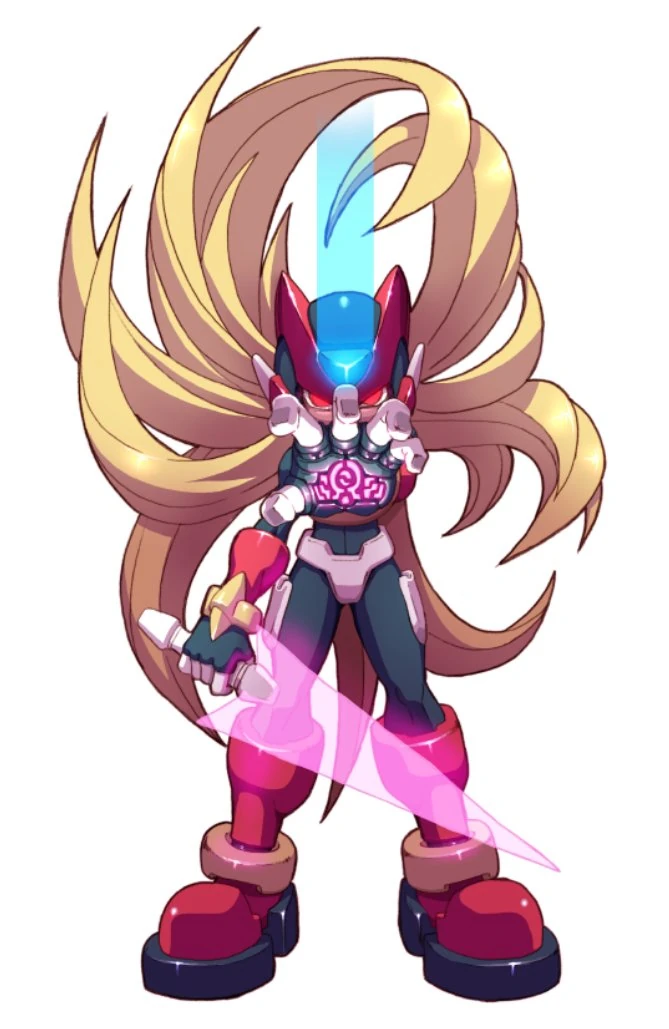
+ | The {{Nihongo|'''Zero Knuckle'''|ゼロナックル|Zero Nakkuru}} is a weapon created by [[Cerveau]] that is used by [[Zero (Mega Man Zero series)|Zero]] in ''[[Mega Man Zero 4]]'',<ref>''Mega Man Zero 4'' instruction manuals<!--技術者セルヴォによって、造られた新たな武器。前作までの武器のように装備するタイブではなく、手のひらに直接チッブを埋め込んで腕力を強化したものである。敵を直接殴ったり、武器を奪ったりすることが可能。チャージをすることで、強力な攻撃ができる。-->.</ref> replacing both the [[Shield Boomerang]] and the rod weapons used in previous games. The Zero Knuckle consists of a Z-shaped chip implanted into Zero's palms that increases his strength.<ref>''"Did you try out your Zero Knuckle yet? You probably already know about it, but it's a weapon on board a chip implanted into your hand. It gives you a big strength boost that comes in handy when attacking enemies or stealing their weapons. It doesn't work for every enemy, but for the ones it does, just finish them off with the Zero Knuckles to grab their weapon."'' - Cerveau, ''Mega Man Zero 4''</ref> By defeating an enemy with the Zero Knuckle, Zero will rip off parts of the enemy and use them as a weapon. A successful theft normally results in the destruction of most enemies, but [[Yadokroid]] and [[Lamplort X]] may survive this attack at least once due to having multiple parts, and some enemies lack usable parts. The weapons or parts can have a number of uses, and some have limited ammunition. If a stolen weapon is out of ammo or simply of no use any longer, it can be thrown away by pressing the Toss button (Select by default) or in the [[Sub Screen]], which can hurt an enemy as well. The Zero Knuckle can be aimed in seven directions horizontally, up, and diagonally, and it can be charged for a stronger hit. The Zero Knuckle also allows Zero to [[Lift Grip|grip]] and hang on some objects, either by using the Zero Knuckle on the object or by pressing up near it, the latter working even when not equipped by the player, and to pull objects such as the vines in the [[Underground Forest]] and [[Tech Kraken]] while he is hidden. |
| + | Since elemental chips have been omitted from the game, it is unknown if the Zero Knuckle is compatible with them like Zero's other weapons. Unlike the [[K Knuckle]] from ''[[Mega Man X8]]'', the Zero Knuckle cannot make use of the [[EX Skill]]s learned in the game. |
||
| − | The [[Weapon Plus Head Chip]] increases maximum ammo by 1. |
||
| ⚫ | |||
| − | Unlike the [[K Knuckle]] from ''[[Mega Man X8]]'', the Zero Knuckle cannot make use of the EX-Skills learned in the game. Also, the weapons it steals cannot be carried over to other areas. |
||
| + | Zero can hold only one of these weapons at a time, and the weapons cannot be carried over to other areas, being discarted in the end of a [[mission]]. The [[Chips (Mega Man Zero series)|Weapon Plus Head Chip]] increases maximum ammo by 1. ''Mega Man Zero 4'' has a total of 54 weapons, divided into five types: |
||
| + | *'''[[Buster]]''' - Ranged attack. There are eighteen busters available with a variable number of uses and power. |
||
| + | *'''[[Saber]]''' - A short ranged swinging attack with high attack power. There are five sabers available, three of them having unlimited uses. Their usage is similar to the [[Z-Saber|Z Saber]], except that they can't perform combos, the standard attack being like the third slash, and lack a walking slash, dashing slash, skull crush and EX Skills. While a single hit from most cause more damage than a Z Saber slash, a well done Z Saber combo can pass their damage, making them more suited against targets that are hard to hit with combos. |
||
| + | *'''Rod''' - A thrust with variable power and range. There are twelve rods available. Except for three rods, they can be used any number of times. They can be aimed in eight directions, horizontally, vertically, and diagonally. Zero can only aim directly down while airborne. |
||
| + | *'''Shield''' - Mainly used to block or reflect some enemy projectiles. With one exception, the five shields available can be used any number of times. Some can deal a small amount of damage. |
||
| + | *'''Bomb''' - Mainly throws a bomb in an arc that explodes on impact, Gear Bomb and Gyro Boomerang being exceptions. There are fourteen available. They have the smallest number of uses, but many of them cause high damage. |
||
{{-}} |
{{-}} |
||
| + | {|class="wikitable sortable" |
||
| − | |||
| + | !width="115px"|Graphic!!Name!!<small>Power</small>!!<small>Element</small> |
||
| ⚫ | |||
| + | !<small>Ammo</small>!!<small>Type</small>!!Enemy!!width="30%"|Description |
||
| − | Zero can hold only one of these weapons at a time. |
||
| − | {|border=1 cellspacing=0 cellpadding=2 style="border-collapse:collapse |
||
| − | !Graphic!!Name!!Ammo!!Type!!Enemy!!Description |
||
|- |
|- |
||
| − | |[[File:2WayShot.png|right|2WS]]||2-Way Shot<br />(2WAYショット) |
+ | |{{A|2-Way Shot}}[[File:2WayShot.png|right|2WS]]||2-Way Shot<br />(2WAYショット) |
| + | |2||None||∞||Buster||[[Gyro Cannon H]] |
||
| + | |Fires 2 shots diagonally. |
||
|- |
|- |
||
| − | |[[File:3WayBomb.png|right|3WB]]||3-Way Bomb<br />(3WAYボム) |
+ | |{{A|3-Way Bomb}}[[File:3WayBomb.png|right|3WB]]||3-Way Bomb<br />(3WAYボム) |
| + | |9/2||None||x1||Bomb||[[NicosCrab#NicosCrabB|NicosCrabB]] |
||
| + | |Bomb that shoots 3 bullets on impact. |
||
|- |
|- |
||
| + | |{{A|Ball}} ||Ball |
||
| ⚫ | |||
| + | | -|| -||x1||Bomb||Rolling ball |
||
| + | |Only in the Busy Basket minigame. |
||
|- |
|- |
||
| − | |[[File: |
+ | |{{A|Balloon Bomb}}[[File:BalloonBomb.png|right|BB]]||Balloon Bomb<br />(バルーンボム) |
| + | |8/4||None||x1||Bomb||[[NeedBalloon]] |
||
| ⚫ | |||
|- |
|- |
||
| − | |[[File: |
+ | |{{A|Beam Shot}}[[File:BeamShot.png|right|BS]]||Beam Shot<br />(ビームショット) |
| + | |6||None||∞||Buster||[[BeamWalker]] |
||
| + | |Fires a laser, it is more powerful than the buster shot, and pierces through enemies. |
||
|- |
|- |
||
| + | |{{A|Bee Rod}}[[File:BeeRod.png|right|BR]]||Bee Rod<br />(ビーロッド) |
||
| − | |[[File:BendLaser.png|right|BR]]||Bend Laser<br />(ベンドレーザー)||x8||Buster||[[E-Laser]]||Laser that bounces off walls and terrain. Dissipates after hitting an enemy. |
||
| + | |4||None||∞||Rod||[[Appnet]] |
||
| + | |Zero attacks with an Appnet's stinger. |
||
|- |
|- |
||
| − | |[[File: |
+ | |{{A|Bend Laser}}[[File:BendLaser.png|right|Laser Gun]]||Bend Laser<br />(ベンドレーザー) |
| + | |6||None||x8||Buster||[[E-Laser]] |
||
| + | |Laser that bends itself when it coincides vertically with an enemy, changing its direction either upwards or downwards. |
||
|- |
|- |
||
| + | |{{A|Blade Shield}}[[File:BladeShield.png|right|BS]]||Blade Shield<br />(ブレードシールド) |
||
| − | |[[File:BlazeShot.png|right|BS]]||Blaze Shot<br />(ブレイズバスター)||x8||Buster||[[Variant#Variant Fire|Variant Fire]]||Fires a bomb forward, exploding on impact. Can melt snow. |
||
| + | |1||None||∞||Shield||[[SandDozer]] |
||
| + | |Reflects bullets. Also causes minimal damage when deployed. |
||
|- |
|- |
||
| − | |[[File: |
+ | |{{A|Blaze Shot}}[[File:BlazeShot.png|right|BS]]||Blaze Shot<br />(ブレイズバスター,<br />"Blaze Buster") |
| + | |4/7||Fire||x8||Buster||[[Variant Fire]] |
||
| + | |Fires a bomb forward, creating a flame that lingers for a moment. Can melt snow and burn some trucks in the first mission. |
||
|- |
|- |
||
| + | |{{A|Bound Tire}}[[File:BoundTire.png|right|BT]]||Bound Tire<br />(バウンドタイヤ) |
||
| − | |[[File:BurstBomb.png|right|BB]]||Burst Bomb<br />(バーストボム)||x3||Bomb||Boxes in first stage.||Powerful bomb that explodes with a wider range than any other bomb. |
||
| + | |16||None||x1||Bomb||[[Kerberos]] |
||
| + | |Bounces off terrain, explodes after a few bounces. If it misses, Zero can pick it up again with the Zero Knuckle. |
||
|- |
|- |
||
| − | |[[File: |
+ | |{{A|Burst Bomb}}[[File:BurstBomb.png|right|BB]]||Burst Bomb<br />(バーストボム) |
| + | |4/6 x 4||None||x3||Bomb||Boxes in the [[Caravan in the Wilderness|first mission]]. |
||
| + | |Powerful bomb that explodes with a wider range than most other bombs. |
||
|- |
|- |
||
| + | |{{A|Cannon Buster}}[[File:CannonBuster.png|right|CB]]||Cannon Buster<br />(キャノンバスター) |
||
| ⚫ | |||
| + | |8||None||x6||Buster||[[RBCannon]] |
||
| + | |Lobs a green shot forward that bounces off terrain. |
||
|- |
|- |
||
| + | |{{A|Card Key}}[[File:CardKey.png|right|CK]]||Card Key<br />(カードキー) |
||
| ⚫ | |||
| + | |4||None||x1||Rod||[[NicosCrab#NicosCrabC|NicosCrabC]] |
||
| ⚫ | |||
|- |
|- |
||
| + | |{{A|Cross Shot}}[[File:CrossShot.png|right|CS]]||Cross Shot<br />(クロスショット) |
||
| − | |[[File:DeathPierce.png|right|DP]]||Death Pierce<br />(デスピアス)||x1||Saber||One of [[Dr. Weil]]'s 1st form attacks.||Swings a powerful sword. Gets used up when an enemy is destroyed. |
||
| + | |4/2||None||∞||Buster||[[Crossbyne]] |
||
| ⚫ | |||
|- |
|- |
||
| + | |{{A|Death Pierce}}[[File:DeathPierce.png|right|DP]]||Death Pierce<br />(デスピアス) |
||
| − | |[[File:DrillRod.png|right|DR]]||Drill Rod<br />(ドリルロッド)||x6||Rod||[[GangaGun]]||Fires an extending drill. On enemy impact summons blobs of lava for extra damage. |
||
| + | |20||None||x1||Saber||One of [[Dr. Weil]]'s 1st form attacks. |
||
| + | |Swings a powerful sword. Gets used up when an enemy is destroyed. |
||
|- |
|- |
||
| − | |[[File: |
+ | |{{A|Drill Rod}}[[File:DrillRod.png|right|Spear]]||Drill Rod<br />(ドリルロッド) |
| + | |3x9||None||x6||Rod||[[GangaGun]] |
||
| + | |Fires an extending drill that can pass through terrain, but not through shields. On enemy impact, it stops its extension and keeps drilling for a second, hitting up to nine times. Usage count only decreases when it hits something. Can destroy the [[Telly Bomb]] blocks in the [[Teleporter Base]] without decreasing uses. |
||
|- |
|- |
||
| − | |[[File: |
+ | |{{A|Drill Shot}}[[File:DrillShot.png|right|DS]]||Drill Shot<br />(ドリルショット) |
| + | |5x4||None||x8||Buster||[[Molegule]] |
||
| + | |Fires a single drill with moderate damage output, so it might pierce through weaker enemies. |
||
|- |
|- |
||
| − | |[[File: |
+ | |{{A|Egg Bomb}}[[File:EggBomb.png|right|EB]]||Egg Bomb<br />(エッグボム) |
| + | |12x12||None||x1||Bomb||[[Fire Renant]]'s Egg Bombs |
||
| + | |Powerful bomb that explodes with a wider range than most other bombs. Very similar to the Burst Bomb, but has only one shot. |
||
|- |
|- |
||
| − | |[[File: |
+ | |{{A|Electric Arm}}[[File:ElectricArm.png|right|EA]]||Electric Arm<br />(エレキアーム,<br />"Elec Arm") |
| + | |6||Thunder||∞||Rod||[[Pantheon Corpse]] |
||
| + | |A stab with an electric club. Short ranged, but fast and can be aimed in eight directions. |
||
|- |
|- |
||
| − | |[[File: |
+ | |{{A|Electric Rod}}[[File:ElectricRod.png|right|ER]]||Electric Rod<br />(エレキロッド,<br />"Elec Rod") |
| + | |10/4||Thunder||x6||Rod||[[Raiken]] |
||
| + | |When the rod hits terrain, it sends sparks moving across the ground. |
||
|- |
|- |
||
| + | |{{A|Electric Nail}}[[File:ElectricNail.png|right|EN]]||Electric Nail<br />(エレキネイル,<br />"Elec Nail") |
||
| ⚫ | |||
| + | |5/5||Thunder||∞||Rod||[[EleDeserter]] |
||
| + | |Creates an electric orb that lingers for a few moments. Good for "nailing" enemies in place. |
||
|- |
|- |
||
| − | |[[File: |
+ | |{{A|Flame Sword}}[[File:FlameSword.png|right|FS]]||Flame Sword<br />(フレイムソード) |
| + | |10||Fire||∞||Saber||[[Faital]] |
||
| ⚫ | |||
|- |
|- |
||
| − | |[[File: |
+ | |{{A|Gear Bomb}}[[File:GearBomb.png|right|GB]]||Gear Bomb<br />(ギアボム) |
| + | |14||None||x1||Bomb||[[Serpent Gear]] |
||
| + | |Normal bomb that travels straight horizontally. |
||
|- |
|- |
||
| + | |{{A|Gyro Boomerang}}[[File:GyroBoomerang.png|right|GB]]||Gyro Boomerang<br />(ジャイロブーメラン) |
||
| − | |[[File:HeatSabre.png|right|HS]]||Heat Sabre<br />(ヒートサーベル)||∞||Rod||[[Variant#Variant Fencer|Variant Fencer]]||Zero thrusts forward similar to a charged recoil rod. |
||
| + | |10||None||x1||Bomb||[[Gyrator]] |
||
| + | |It acts like the thrown Shield Boomerang. It will get destroyed upon collision with a strong enemy. If it misses, Zero can pick it up again with the Zero Knuckle upon return. |
||
|- |
|- |
||
| + | |{{A|Heat Sabre}}[[File:HeatSabre.png|right|HS]]||Heat Sabre<br />(ヒートサーベル) |
||
| ⚫ | |||
| + | |12||Fire||∞||Rod||[[Variant Fencer]] |
||
| + | |Zero thrusts forward a short distance. Deals Fire damage. |
||
|- |
|- |
||
| − | |[[File: |
+ | |{{A|Hive Bomb}}[[File:HiveBomb.png|right|HB]]||Hive Bomb<br />(ハイブボム) |
| + | |2||None||x1||Bomb||[[Beeneran]] |
||
| ⚫ | |||
|- |
|- |
||
| − | |[[File: |
+ | |{{A|Ice Buster}}[[File:IceBuster.png|right|IB]]||Ice Buster<br />(アイスバスター) |
| + | |6||Ice||x8||Buster||[[Glacial]] |
||
| + | |Lobs a chunk of ice to freeze enemies. Can freeze the water from the fountains in the [[Hanging Gardens]], making a temporary platform. |
||
|- |
|- |
||
| − | |[[File: |
+ | |{{A|Ice Shield}}[[File:IceShield.png|right|IS]]||Ice Shield<br />(アイスシールド) |
| + | |1||Ice||∞*||Shield ||[[Hechrysta]] |
||
| + | |Is used up after preventing a projectile, splitting into six directions and causing a small amount of damage. |
||
|- |
|- |
||
| − | |[[File: |
+ | |{{A|IM Shot}}[[File:IMShot.png|right|IMShot]]||IM Shot<br />(アイムショット,<br />"Aim Shot") |
| + | |2||None||∞||Buster||[[Yadokroid]] |
||
| + | |Fires shots that are automatically aimed at nearby enemies. Better tracking than the Search Shot, but slower projectile speed. |
||
|- |
|- |
||
| − | |[[File: |
+ | |{{A|Iron Pipe}}[[File:IronPipe.png|right|IP]]||Iron Pipe<br />(てつパイプ) |
| + | |12||None||x6||Saber||Iron Pipe found in [[Hibernation Chamber]]. |
||
| + | |Attacks by swinging an iron pipe. |
||
|- |
|- |
||
| + | |{{A|Joint Bomb}}[[File:JointBomb.png|right|JB]]||Joint Bomb<br />(ジョイントボム) |
||
| − | |[[File:Lamp.png|right|L]]||Lamp<br />(でんとう)||∞||Buster||Lamps in Hibernation Chamber.||Repel scrap elves in the Hibernation Chamber. |
||
| + | |8/8||None||x4||Bomb||[[Bonsect]] |
||
| + | |Throws a joint from Bonsect's body. |
||
|- |
|- |
||
| − | |[[File: |
+ | |{{A|Lamp}}[[File:Lamp.png|right|L]]||Lamp<br />(でんとう) |
| + | | -|| -||∞||Buster||Lamps in Hibernation Chamber. |
||
| + | |Shines a light in front of Zero. Can be used to repel [[Scrap Elf|Scrap Elves]] in the Hibernation Chamber. |
||
|- |
|- |
||
| − | |[[File: |
+ | |{{A|Lamp Shield}}[[File:LampShield.png|right|LS]]||Lamp Shield<br />(ランプシールド) |
| + | | -|| -||∞||Shield||[[Lamplort#Lamplort X|Lamplort X]]'s shield |
||
| + | |Blocks energy shots. |
||
|- |
|- |
||
| − | |[[File: |
+ | |{{A|Lamp Burner}}[[File:LampBurner.png|right|LB]]||Lamp Burner<br />(ランプバーナー) |
| + | |3x16||Fire||x6||Buster||[[Lamplort#Lamplort X|Lamplort X]] |
||
| + | |Flamethrower that hits multiple times. Can burn some obstacles in the first mission. |
||
|- |
|- |
||
| + | |{{A|Long Snapper}}[[File:LongSnapper.png|right|LS]]||Long Snapper<br />(ロングスナッパー) |
||
| − | |[[File:MagPunchN.png|right|MPN]]||MagPunch N<br />(マグネパンチN,<br />MagnePunch N)||∞||Rod ||[[MagnePa#MagnePaN|MagnePaN]]||Depending on what gravitational field you are currently in, either blue (South) or red (North), will increase or decrease your jump height. |
||
| + | |2x5||None||∞||Rod||[[Poplan]] |
||
| + | |A Poplan head is thrust from Zero's arm, hitting up to five times as it snaps its jaws. Can pass through terrain and shields. |
||
|- |
|- |
||
| − | |[[File: |
+ | |{{A|MagPunch N}}[[File:MagPunchN.png|right|MPN]]||MagPunch N<br />(マグネパンチN,<br />"Magne-Punch N") |
| + | |4||None||∞||Rod ||[[MagnePaN]] |
||
| + | |A punch that repels [[MagnePaN]] and [[MagneMineN]], and disables [[MagnePaS]] and [[MagneMineS]]. |
||
|- |
|- |
||
| + | |{{A|MagPunch S}}[[File:MagPunchS.png|right|MPS]]||MagPunch S<br />(マグネパンチS,<br />"Magne-Punch S") |
||
| − | |[[File:MegaAxe.png|right|MA]]||Mega Axe<br />(メガアックス)||∞||Saber||[[Shotloid#Axeloid|Axeloid]]||Acts like a non-elemental Flame Sword. |
||
| + | |4||None||∞||Rod ||[[MagnePaS]] |
||
| + | |A punch that repels MagnePaS and MagneMineS, and disables MagnePaN and MagneMineN. |
||
|- |
|- |
||
| − | |[[File: |
+ | |{{A|Mega Axe}}[[File:MegaAxe.png|right|MA]]||Mega Axe<br />(メガアックス) |
| + | |16||None||∞||Saber||[[Axeloid]] |
||
| + | |Acts like a non-elemental Flame Sword. It tends to be pretty convenient because of its power. |
||
|- |
|- |
||
| + | |{{A|Mega Hammer}}[[File:MegaHammer.png|right|MH]]||Mega Hammer<br />(メガハンマー) |
||
| − | |[[File:MetShield.png|right|MS]]||Met Shield<br />(メットシールド)||∞||Shield||[[Met#Mets in the Zero series|Mettaur]]||Blocks energy shots, but so small it offers little cover. |
||
| + | |10||None||∞||Saber ||[[Moloid]] |
||
| + | |The same as the Mega Axe, but slower. Used to activate water pumps in the Human Settlement. |
||
|- |
|- |
||
| − | |[[File: |
+ | |{{A|Met Shield}}[[File:MetShield.png|right|MS]]||Met Shield<br />(メットシールド) |
| + | | -|| -||∞||Shield||[[Mettaur (Mega Man Zero 4)|Mettaur]] |
||
| + | |Blocks energy shots, but so small it offers little cover. |
||
|- |
|- |
||
| − | |[[File: |
+ | |{{A|Mini Craban B}}[[File:MiniCrabanB.png|right|MCB]]||Mini Craban B<br />(ミニクラバーンB) |
| + | |12||None||x1||Bomb||[[ClabangerNS#Mini Craban B|Mini Craban B]] |
||
| + | |Normal bomb. |
||
|- |
|- |
||
| − | |[[File: |
+ | |{{A|Mini Craban R}}[[File:MiniCrabanR.png|right|MC]]||Mini Craban R<br />(ミニクラバーンR) |
| + | |12||None||x1||Bomb||[[ClabangerNS#Mini Craban R|Mini Craban R]] |
||
| + | |Normal bomb. |
||
|- |
|- |
||
| + | |{{A|Neon Bomb}}[[File:NeonBomb.png|right|NB]]||Neon Bomb<br />(ネオンボム) |
||
| ⚫ | |||
| + | |5x3||Thunder||x2||Bomb||[[CryoNeon]] |
||
| + | |Throws a bomb that leaves behind a large electric spark that lingers for a while. Can be used to perform [[damage stacking]]. |
||
|- |
|- |
||
| ⚫ | |||
| ⚫ | |||
| + | |4||None||∞||Buster||[[RefleBeemer]] |
||
| + | |Fires two shots that reflect off of terrain. Slow rate of fire and low damage. |
||
|- |
|- |
||
| ⚫ | |||
| ⚫ | |||
| + | |8/8||Fire||x2||Bomb||[[Bombadeer]] |
||
| + | |Throws a bomb, which upon impact with the ground, creates a single rising flame that lingers for a few moments. |
||
|- |
|- |
||
| − | |[[File: |
+ | |{{A|Search Shot}}[[File:SearchShot.png|right|SS]]||Search Shot<br />(サーチショット) |
| + | |2||None||∞||Buster||[[ArcCannon]] |
||
| ⚫ | |||
|- |
|- |
||
| − | |[[File: |
+ | |{{A|Sharp Shield}}[[File:SharpShield.png|right|SS]]||Sharp Shield<br />(シャープシールド) |
| + | |1||None||∞||Shield||[[Yadokroid]]'s shell |
||
| + | |Similar to the Met Shield, but with a wider shield area. It also deals a little damage to enemies the moment Zero deploys it. |
||
|- |
|- |
||
| + | |{{A|Spread Shot}}[[File:SpreadShot.png|right|SS]]||Spread Shot<br />(スプレッドショット) |
||
| ⚫ | |||
| + | |2x4||None||∞||Buster||[[Cannon Hopper]] |
||
| + | |Fires a volley of four energy shots in a spread pattern. |
||
|- |
|- |
||
| ⚫ | |||
| − | |[[File:TangRod.png|right|TR]]||Tang Rod<br />(タングロッド,<br />Tongue Rod)||∞||Rod||[[Kerosh]]||Acts like the chain rod, except slower. |
||
| + | |10||None||∞||Rod||[[Variant Claw]] |
||
| + | |Attacks with giant metal claws. |
||
|- |
|- |
||
| − | |[[File: |
+ | |{{A|Tang Rod}}[[File:TangRod.png|right|TR]]||Tang Rod<br />(タングロッド,<br />"Tongue Rod") |
| + | |4x2||None||∞||Rod||[[Kerosh]] |
||
| + | |Has a good range and can penetrate enemies, but is a bit slow. |
||
|- |
|- |
||
| − | |[[File: |
+ | |{{A|Tri Shot}}[[File:TriShot.png|right|TS]]||Tri Shot<br />(トライショット) |
| + | |4||None||∞||Buster||[[Triaformer]] |
||
| + | |Automatically aims at targets similarly to the IM Shot, but the shots linger for a moment after being fired. |
||
|- |
|- |
||
| + | |{{A|Vertical Shot}}[[File:VerticalShot.png|right|VS]]||Vertical Shot<br />(バーチカルショット) |
||
| − | |[[File:WaterGun.png|right|WG]]||Water Gun<br />(ウォーターガン)||x8||Buster||Water pumps in the Area Zero mid-stage.||Fires water for a short distance, weak against enemies but extinguishes fires. |
||
| + | |4||None||∞||Buster||[[MeduHopper]] |
||
| + | |Does considerably more damage than normal shots. Can only fire up and down, its usefulness depending on the terrain and target. |
||
|- |
|- |
||
| − | |[[File: |
+ | |{{A|Water Gun}}[[File:WaterGun.png|right|WG]]||Water Gun<br />(ウォーターガン) |
| + | |1||None||x8||Buster||Water pumps in the [[Human Settlement]] mission. |
||
| + | |Fires water for a short distance, weak against enemies but extinguishes fires. |
||
|- |
|- |
||
| + | |{{A|Wave Bomb}}[[File:WaveBomb.png|right|WB]]||Wave Bomb<br />(ウェーブボム) |
||
| ⚫ | |||
| + | |8/8x8||Fire||x1||Bomb||[[Bongal]] |
||
| + | |Throws a bomb, which upon impact with the ground, creates a line of flames which linger for a few moments. |
||
| + | |- |
||
| + | |{{A|Wide Buster}}[[File:WideBuster.png|right|WB]]||Wide Buster<br />(ワイドバスター) |
||
| + | |5/4||None||x4||Buster||[[Variant Missile]] |
||
| ⚫ | |||
|} |
|} |
||
| + | ==''Mega Man X DiVE''== |
||
| ⚫ | |||
| + | Zero Knuckle appeared as one of the Active Skills from the Zero (Z) [[Hunter Program]] in ''[[Mega Man X DiVE]]''. It is a short ranged attack that causes damage and has a chance of temporarily immobilizing targets. As Zero (Z) is upgraded, new effects become available for the skill. The skill has three chips, but only one can be equipped at a time: Power Increase rises the skill's damage rate by 5%, Armed Destruction makes the attack temporarily reduce the target's attack power, and Seize Weapon has a chance to temporarily disable a weapon from other [[player]] in the Arena. |
||
| + | |||
| + | Zero (Z) can also gain two Passive Skills, Show Time and Life Steal, that respectively gives the Zero Knuckle a barrier after use and a chance of stealing life energy from the target to recover Zero's own energy. He also has two Fixed DNA upgrades, Clean Hit, which prevents the immobility caused by it to be removed by other effects and ignores Preventive Shields, and Chip Upgrade, which increases the chance of triggering Life Steal by 50%. |
||
| + | |||
| + | ==Trivia== |
||
| + | [[File:Omega Zero (ZX).jpg|thumb|120px|Omega's artwork form Mega Man ZX]] |
||
| + | *The artwork of [[Omega]] from ''[[Mega Man ZX (video game)|Mega Man ZX]]'' show him having what appears to be a knuckle on his own, but with an Omega symbol (Ω) instead of a Z. However, he was never shown using it in any games, although he did use fist to release some moves. |
||
| + | |||
| + | ==References== |
||
| + | {{Reflist}} |
||
| ⚫ | |||
| + | {{Z4}} |
||
[[Category:Zero's weapons and techniques]] |
[[Category:Zero's weapons and techniques]] |
||
| − | [[Category:Mega Man Zero]] |
+ | [[Category:Mega Man Zero series]] |
| − | [[Category: |
+ | [[Category:Mega Man Zero series items]] |
[[Category:Chargeable weapons]] |
[[Category:Chargeable weapons]] |
||
Latest revision as of 04:02, 1 June 2023
The Zero Knuckle (ゼロナックル Zero Nakkuru) is a weapon created by Cerveau that is used by Zero in Mega Man Zero 4,[1] replacing both the Shield Boomerang and the rod weapons used in previous games. The Zero Knuckle consists of a Z-shaped chip implanted into Zero's palms that increases his strength.[2] By defeating an enemy with the Zero Knuckle, Zero will rip off parts of the enemy and use them as a weapon. A successful theft normally results in the destruction of most enemies, but Yadokroid and Lamplort X may survive this attack at least once due to having multiple parts, and some enemies lack usable parts. The weapons or parts can have a number of uses, and some have limited ammunition. If a stolen weapon is out of ammo or simply of no use any longer, it can be thrown away by pressing the Toss button (Select by default) or in the Sub Screen, which can hurt an enemy as well. The Zero Knuckle can be aimed in seven directions horizontally, up, and diagonally, and it can be charged for a stronger hit. The Zero Knuckle also allows Zero to grip and hang on some objects, either by using the Zero Knuckle on the object or by pressing up near it, the latter working even when not equipped by the player, and to pull objects such as the vines in the Underground Forest and Tech Kraken while he is hidden.
Since elemental chips have been omitted from the game, it is unknown if the Zero Knuckle is compatible with them like Zero's other weapons. Unlike the K Knuckle from Mega Man X8, the Zero Knuckle cannot make use of the EX Skills learned in the game.
List of Zero Knuckle weapons
Zero can hold only one of these weapons at a time, and the weapons cannot be carried over to other areas, being discarted in the end of a mission. The Weapon Plus Head Chip increases maximum ammo by 1. Mega Man Zero 4 has a total of 54 weapons, divided into five types:
- Buster - Ranged attack. There are eighteen busters available with a variable number of uses and power.
- Saber - A short ranged swinging attack with high attack power. There are five sabers available, three of them having unlimited uses. Their usage is similar to the Z Saber, except that they can't perform combos, the standard attack being like the third slash, and lack a walking slash, dashing slash, skull crush and EX Skills. While a single hit from most cause more damage than a Z Saber slash, a well done Z Saber combo can pass their damage, making them more suited against targets that are hard to hit with combos.
- Rod - A thrust with variable power and range. There are twelve rods available. Except for three rods, they can be used any number of times. They can be aimed in eight directions, horizontally, vertically, and diagonally. Zero can only aim directly down while airborne.
- Shield - Mainly used to block or reflect some enemy projectiles. With one exception, the five shields available can be used any number of times. Some can deal a small amount of damage.
- Bomb - Mainly throws a bomb in an arc that explodes on impact, Gear Bomb and Gyro Boomerang being exceptions. There are fourteen available. They have the smallest number of uses, but many of them cause high damage.
| Graphic | Name | Power | Element | Ammo | Type | Enemy | Description |
|---|---|---|---|---|---|---|---|
| 2-Way Shot (2WAYショット) |
2 | None | ∞ | Buster | Gyro Cannon H | Fires 2 shots diagonally. | |
 |
3-Way Bomb (3WAYボム) |
9/2 | None | x1 | Bomb | NicosCrabB | Bomb that shoots 3 bullets on impact. |
| Ball | - | - | x1 | Bomb | Rolling ball | Only in the Busy Basket minigame. | |
 |
Balloon Bomb (バルーンボム) |
8/4 | None | x1 | Bomb | NeedBalloon | Explodes after being thrown a certain distance, firing 8 needles in all directions. |
| Beam Shot (ビームショット) |
6 | None | ∞ | Buster | BeamWalker | Fires a laser, it is more powerful than the buster shot, and pierces through enemies. | |
| Bee Rod (ビーロッド) |
4 | None | ∞ | Rod | Appnet | Zero attacks with an Appnet's stinger. | |
| Bend Laser (ベンドレーザー) |
6 | None | x8 | Buster | E-Laser | Laser that bends itself when it coincides vertically with an enemy, changing its direction either upwards or downwards. | |
| Blade Shield (ブレードシールド) |
1 | None | ∞ | Shield | SandDozer | Reflects bullets. Also causes minimal damage when deployed. | |
| Blaze Shot (ブレイズバスター, "Blaze Buster") |
4/7 | Fire | x8 | Buster | Variant Fire | Fires a bomb forward, creating a flame that lingers for a moment. Can melt snow and burn some trucks in the first mission. | |
 |
Bound Tire (バウンドタイヤ) |
16 | None | x1 | Bomb | Kerberos | Bounces off terrain, explodes after a few bounces. If it misses, Zero can pick it up again with the Zero Knuckle. |
 |
Burst Bomb (バーストボム) |
4/6 x 4 | None | x3 | Bomb | Boxes in the first mission. | Powerful bomb that explodes with a wider range than most other bombs. |
| Cannon Buster (キャノンバスター) |
8 | None | x6 | Buster | RBCannon | Lobs a green shot forward that bounces off terrain. | |
| Card Key (カードキー) |
4 | None | x1 | Rod | NicosCrabC | Mainly used to open a door that leads to a Sub Tank. Immediately destroyed when used to attack an enemy. | |
| Cross Shot (クロスショット) |
4/2 | None | ∞ | Buster | Crossbyne | Fires a spiked ball. Depending on when it hits something, spreads needles either all diagonal directions, or fires vertically and horizontally. | |
 |
Death Pierce (デスピアス) |
20 | None | x1 | Saber | One of Dr. Weil's 1st form attacks. | Swings a powerful sword. Gets used up when an enemy is destroyed. |
| Drill Rod (ドリルロッド) |
3x9 | None | x6 | Rod | GangaGun | Fires an extending drill that can pass through terrain, but not through shields. On enemy impact, it stops its extension and keeps drilling for a second, hitting up to nine times. Usage count only decreases when it hits something. Can destroy the Telly Bomb blocks in the Teleporter Base without decreasing uses. | |
| Drill Shot (ドリルショット) |
5x4 | None | x8 | Buster | Molegule | Fires a single drill with moderate damage output, so it might pierce through weaker enemies. | |
 |
Egg Bomb (エッグボム) |
12x12 | None | x1 | Bomb | Fire Renant's Egg Bombs | Powerful bomb that explodes with a wider range than most other bombs. Very similar to the Burst Bomb, but has only one shot. |
| Electric Arm (エレキアーム, "Elec Arm") |
6 | Thunder | ∞ | Rod | Pantheon Corpse | A stab with an electric club. Short ranged, but fast and can be aimed in eight directions. | |
| Electric Rod (エレキロッド, "Elec Rod") |
10/4 | Thunder | x6 | Rod | Raiken | When the rod hits terrain, it sends sparks moving across the ground. | |
| Electric Nail (エレキネイル, "Elec Nail") |
5/5 | Thunder | ∞ | Rod | EleDeserter | Creates an electric orb that lingers for a few moments. Good for "nailing" enemies in place. | |
 |
Flame Sword (フレイムソード) |
10 | Fire | ∞ | Saber | Faital | An incredibly strong sword. Can replace the Z-Saber due to its power, but cannot perform combos. |
| Gear Bomb (ギアボム) |
14 | None | x1 | Bomb | Serpent Gear | Normal bomb that travels straight horizontally. | |
| Gyro Boomerang (ジャイロブーメラン) |
10 | None | x1 | Bomb | Gyrator | It acts like the thrown Shield Boomerang. It will get destroyed upon collision with a strong enemy. If it misses, Zero can pick it up again with the Zero Knuckle upon return. | |
| Heat Sabre (ヒートサーベル) |
12 | Fire | ∞ | Rod | Variant Fencer | Zero thrusts forward a short distance. Deals Fire damage. | |
 |
Hive Bomb (ハイブボム) |
2 | None | x1 | Bomb | Beeneran | Fires a bomb that summons 3 bees. If touched, the bees will hurt Zero. |
| Ice Buster (アイスバスター) |
6 | Ice | x8 | Buster | Glacial | Lobs a chunk of ice to freeze enemies. Can freeze the water from the fountains in the Hanging Gardens, making a temporary platform. | |
| Ice Shield (アイスシールド) |
1 | Ice | ∞* | Shield | Hechrysta | Is used up after preventing a projectile, splitting into six directions and causing a small amount of damage. | |
| IM Shot (アイムショット, "Aim Shot") |
2 | None | ∞ | Buster | Yadokroid | Fires shots that are automatically aimed at nearby enemies. Better tracking than the Search Shot, but slower projectile speed. | |
| Iron Pipe (てつパイプ) |
12 | None | x6 | Saber | Iron Pipe found in Hibernation Chamber. | Attacks by swinging an iron pipe. | |
 |
Joint Bomb (ジョイントボム) |
8/8 | None | x4 | Bomb | Bonsect | Throws a joint from Bonsect's body. |
 |
Lamp (でんとう) |
- | - | ∞ | Buster | Lamps in Hibernation Chamber. | Shines a light in front of Zero. Can be used to repel Scrap Elves in the Hibernation Chamber. |
| Lamp Shield (ランプシールド) |
- | - | ∞ | Shield | Lamplort X's shield | Blocks energy shots. | |
| Lamp Burner (ランプバーナー) |
3x16 | Fire | x6 | Buster | Lamplort X | Flamethrower that hits multiple times. Can burn some obstacles in the first mission. | |
| Long Snapper (ロングスナッパー) |
2x5 | None | ∞ | Rod | Poplan | A Poplan head is thrust from Zero's arm, hitting up to five times as it snaps its jaws. Can pass through terrain and shields. | |
| MagPunch N (マグネパンチN, "Magne-Punch N") |
4 | None | ∞ | Rod | MagnePaN | A punch that repels MagnePaN and MagneMineN, and disables MagnePaS and MagneMineS. | |
| MagPunch S (マグネパンチS, "Magne-Punch S") |
4 | None | ∞ | Rod | MagnePaS | A punch that repels MagnePaS and MagneMineS, and disables MagnePaN and MagneMineN. | |
| Mega Axe (メガアックス) |
16 | None | ∞ | Saber | Axeloid | Acts like a non-elemental Flame Sword. It tends to be pretty convenient because of its power. | |
| Mega Hammer (メガハンマー) |
10 | None | ∞ | Saber | Moloid | The same as the Mega Axe, but slower. Used to activate water pumps in the Human Settlement. | |
| Met Shield (メットシールド) |
- | - | ∞ | Shield | Mettaur | Blocks energy shots, but so small it offers little cover. | |
 |
Mini Craban B (ミニクラバーンB) |
12 | None | x1 | Bomb | Mini Craban B | Normal bomb. |
 |
Mini Craban R (ミニクラバーンR) |
12 | None | x1 | Bomb | Mini Craban R | Normal bomb. |
| Neon Bomb (ネオンボム) |
5x3 | Thunder | x2 | Bomb | CryoNeon | Throws a bomb that leaves behind a large electric spark that lingers for a while. Can be used to perform damage stacking. | |
 |
Reflect Laser (リフレーザー, "RefLaser") |
4 | None | ∞ | Buster | RefleBeemer | Fires two shots that reflect off of terrain. Slow rate of fire and low damage. |
 |
Rising Bomb (ライジングボム) |
8/8 | Fire | x2 | Bomb | Bombadeer | Throws a bomb, which upon impact with the ground, creates a single rising flame that lingers for a few moments. |
| Search Shot (サーチショット) |
2 | None | ∞ | Buster | ArcCannon | Fires regular pellet shots, but will automatically aim towards enemies. | |
| Sharp Shield (シャープシールド) |
1 | None | ∞ | Shield | Yadokroid's shell | Similar to the Met Shield, but with a wider shield area. It also deals a little damage to enemies the moment Zero deploys it. | |
| Spread Shot (スプレッドショット) |
2x4 | None | ∞ | Buster | Cannon Hopper | Fires a volley of four energy shots in a spread pattern. | |
| Steel Claw (スティールクロウ) |
10 | None | ∞ | Rod | Variant Claw | Attacks with giant metal claws. | |
| Tang Rod (タングロッド, "Tongue Rod") |
4x2 | None | ∞ | Rod | Kerosh | Has a good range and can penetrate enemies, but is a bit slow. | |
| Tri Shot (トライショット) |
4 | None | ∞ | Buster | Triaformer | Automatically aims at targets similarly to the IM Shot, but the shots linger for a moment after being fired. | |
| Vertical Shot (バーチカルショット) |
4 | None | ∞ | Buster | MeduHopper | Does considerably more damage than normal shots. Can only fire up and down, its usefulness depending on the terrain and target. | |
| Water Gun (ウォーターガン) |
1 | None | x8 | Buster | Water pumps in the Human Settlement mission. | Fires water for a short distance, weak against enemies but extinguishes fires. | |
 |
Wave Bomb (ウェーブボム) |
8/8x8 | Fire | x1 | Bomb | Bongal | Throws a bomb, which upon impact with the ground, creates a line of flames which linger for a few moments. |
| Wide Buster (ワイドバスター) |
5/4 | None | x4 | Buster | Variant Missile | Fires a large missile, which blows up after traveling a very short distance, but summons 5 smaller missiles with unlimited range. |
Mega Man X DiVE
Zero Knuckle appeared as one of the Active Skills from the Zero (Z) Hunter Program in Mega Man X DiVE. It is a short ranged attack that causes damage and has a chance of temporarily immobilizing targets. As Zero (Z) is upgraded, new effects become available for the skill. The skill has three chips, but only one can be equipped at a time: Power Increase rises the skill's damage rate by 5%, Armed Destruction makes the attack temporarily reduce the target's attack power, and Seize Weapon has a chance to temporarily disable a weapon from other player in the Arena.
Zero (Z) can also gain two Passive Skills, Show Time and Life Steal, that respectively gives the Zero Knuckle a barrier after use and a chance of stealing life energy from the target to recover Zero's own energy. He also has two Fixed DNA upgrades, Clean Hit, which prevents the immobility caused by it to be removed by other effects and ignores Preventive Shields, and Chip Upgrade, which increases the chance of triggering Life Steal by 50%.
Trivia

.jpg)
Omega's artwork form Mega Man ZX
- The artwork of Omega from Mega Man ZX show him having what appears to be a knuckle on his own, but with an Omega symbol (Ω) instead of a Z. However, he was never shown using it in any games, although he did use fist to release some moves.
References
- ↑ Mega Man Zero 4 instruction manuals.
- ↑ "Did you try out your Zero Knuckle yet? You probably already know about it, but it's a weapon on board a chip implanted into your hand. It gives you a big strength boost that comes in handy when attacking enemies or stealing their weapons. It doesn't work for every enemy, but for the ones it does, just finish them off with the Zero Knuckles to grab their weapon." - Cerveau, Mega Man Zero 4
| Mega Man Zero 4 | |
|---|---|
| Einherjar Eight Warriors | |
| Pegasolta Eclair • Sol Titanion • Fenri Lunaedge • Noble Mandrago • Mino Magnus • Heat Genblem • Tech Kraken • Popla Cocapetri | |
| Other bosses | |
| SubDesert Core • Carnage Force 0 • Craft • Hell the Giant • Randam Bandam • Cyball • Dr. Weil | |
| Zero's Weaponry and EX Skills | |
| Buster Shot • Z-Saber • Zero Knuckle Tractor Shot • Burning Shot • Ice Javelin • Time Stopper Thunder Stab • Flame Fang • Ice Blade • Sky Chaser | |
| Areas | |
| Caravan in the Wilderness • Resistance Trailer • Area Zero Hanging Gardens • Artificial Sun • Hibernation Chamber • Underground Forest • Magnetic Zone • Particle Beam • Deep Sea • Living City Human Settlement • The Prison • Ragnarok Control Room • Teleporter Base • Teleporter Circuit • Ragnarok Core | |
| Miscellaneous | |
| Game Script • Mega Man Zero 4 database • List of Mega Man Zero 4 enemies | |