No edit summary |
(Virus stats from EXEPoN) Tag: Source edit |
||
| (38 intermediate revisions by 16 users not shown) | |||
| Line 4: | Line 4: | ||
|genus = Mettaur Family |
|genus = Mettaur Family |
||
|variants = Mettaur, MettaurEX, Mettaur2, Mettaur2EX, Mettaur3, Mettaur3EX/MettaurΩ/MettaurSP, RareMettaur, RareMettaur2 |
|variants = Mettaur, MettaurEX, Mettaur2, Mettaur2EX, Mettaur3, Mettaur3EX/MettaurΩ/MettaurSP, RareMettaur, RareMettaur2 |
||
| − | |altname=Mettool |
+ | |altname = Mettool |
| − | |appearances = [[Mega Man Battle Network (video game)|Mega Man Battle Network]]<br>[[Mega Man Network Transmission]]<br>[[Mega Man Battle Network 2]]<br>[[Mega Man Battle Network 3]]<br>[[Mega Man Battle Network 4]]<br>[[ |
+ | |appearances = ''[[Mega Man Battle Network (video game)|Mega Man Battle Network]]<br>[[Rockman.EXE Operate Shooting Star]]<br>[[Mega Man Network Transmission]]<br>[[Mega Man Battle Network 2]]<br>[[Mega Man Battle Network 3]]<br>[[Mega Man Battle Network 4]]<br>[[Rockman.EXE Phantom of Network]]<br>[[Mega Man Battle Network 5]]<br>[[Rockman.EXE Legend of Network]]<br>[[Mega Man Battle Network 6]]'' |
| − | |appear2 = [[MegaMan NT Warrior]] |
+ | |appear2 = ''[[MegaMan NT Warrior]]'' |
| + | |sprite=<span style="padding-right: 20px;">[[File:Mettaur1.png|Mettaur]]</span>[[File:Mettaur2.png|Mettaur2]]<span style="padding: 20px;">[[File:Mettaur3.png|Mettaur3]]</span>[[File:MettaurOmega.png|MettaurSP]] |
||
}} |
}} |
||
| − | {{Nihongo|''' |
+ | '''Mettaur''', known as {{Nihongo|'''Metall'''|メットール|Mettōru}} in Japan, is a common [[Virus (Mega Man Battle Network series)|virus]] type in the ''[[Mega Man Battle Network (series)|Mega Man Battle Network]]'' series, and the only species to have a constant appearance, while other viruses were replaced or omitted. |
| − | == |
+ | ==Characteristics== |
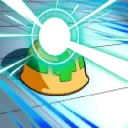
| + | Mettaurs wear small hard hats with crosses on them and wield a pickaxe, which causes a shock wave when thrust into the ground. In the games, they move up and down the columns they are in, sending shockwaves at the player. While normal Mettaurs stand still while the other Mettaurs present attack, stronger variants hide in their helmets and are impervious to attacks (unless they come out of their helmet or are attacked by an attack that can pierce). |
||
| − | [[File:MettaurWave.png|thumb|A Mettaur using Shockwave]] |
||
| + | |||
| + | ==Game History== |
||
| + | In ''[[Mega Man Battle Network 3]]'', a family of Mettaurs can be caught and brought to the [[Virus Breeder]], where a special [[Battle Chip]] can be obtained from them; upon meeting certain conditions, the omega version can also be caught. These enemies are based on the [[Mettaur]] that appeared in the mainline games. |
||
| + | |||
| + | In ''[[Mega Man Battle Network 4]]'', in order to enter [[The Den Battle/City Battle Tournament]], Lan and MegaMan must find the Mettaur Village and retrieve data for a test. The village's locations ends up being in a Jomon billboard Comp in [[Elec Town]]. |
||
| + | |||
| + | In ''[[Mega Man Battle Network 6]]'', Lan and MegaMan must battle a Mettaur with a plunger stuck on its head that's disrupting their home toilet's Net. |
||
| + | |||
| + | ==Mettaur family== |
||
===Mettaur=== |
===Mettaur=== |
||
| − | [[File:Mettaur1.png]] '''Mettaur''': A small black ball with eyes, wearing a yellow hard hat with a green cross on it. Doesn't hide under its helmet. |
+ | [[File:Mettaur1.png]] '''Mettaur''', known as {{Nihongo|'''Metall'''|メットール|Mettōru}}: A small black ball with eyes, wearing a yellow hard hat with a green cross on it. Doesn't hide under its helmet. |
===MettaurEX=== |
===MettaurEX=== |
||
| − | [[File:Mettaur1EX.png]] ''' |
+ | [[File:Mettaur1EX.png]] '''Mettaur EX''', known as {{Nihongo|'''Metall EX'''|メットールEX|}}: Same as Mettaur, but with a light green hard hat and purple cross. |
===Mettaur2=== |
===Mettaur2=== |
||
| − | [[File:Mettaur2.png]] ''' |
+ | [[File:Mettaur2.png]] '''Mettaur 2nd''', known as {{Nihongo|'''Metall 2nd'''|メットール2|Mettōru Sekando}}: Same as Mettaur, but with a red-orange hard hat and dark blue cross. |
===Mettaur2EX=== |
===Mettaur2EX=== |
||
| − | [[File:Mettaur2EX.png]] ''' |
+ | [[File:Mettaur2EX.png]] '''Mettaur 2nd EX''', known as {{Nihongo|'''Metall 2nd EX'''|メットール2EX|}}: Has a brown hard hat and blue cross. |
===Mettaur 3=== |
===Mettaur 3=== |
||
| − | [[File:Mettaur3.png]] ''' |
+ | [[File:Mettaur3.png]] '''Mettaur 3rd''', known as {{Nihongo|'''Metall 3rd'''|メットール3|Mettōru Sādo}}: Has a blue hard hat and yellow cross. Their shockwaves cracks [[panel]]s. |
===Mettaur3EX / MettaurΩ / MettaurSP=== |
===Mettaur3EX / MettaurΩ / MettaurSP=== |
||
| − | [[File:MettaurOmega.png]] ''' |
+ | [[File:MettaurOmega.png]] '''Mettaur 3rd EX''' / '''Mettaur Omega''' / '''Mettaur SP''', known as {{Nihongo|'''Metall 3rd EX'''|メットール3EX|}} / {{Nihongo|'''Metall SP'''|メットールSP|}}: Has a gray hard hat and light blue cross. Their shockwaves turn panels into swamp panels. |
===RareMettaur=== |
===RareMettaur=== |
||
| − | [[File:RareMettaur1.png]] ''' |
+ | [[File:RareMettaur1.png]] '''Rare Mettaur''', known as {{Nihongo|'''Rare Metall'''|レアメットール|Rea Mettōru}}, known as : Has a purple hard hat and orange cross. |
===RareMettaur2=== |
===RareMettaur2=== |
||
| − | [[File:RareMettaur2.png]] ''' |
+ | [[File:RareMettaur2.png]] '''Rare Mettaur 2nd''', known as {{Nihongo|'''Rare Metall 2nd'''|レアメットール|Rea Mettōru Sekando}}: Has a light blue hard hat and dark blue cross. |
| − | ==Virus |
+ | ==Virus stats by game== |
===''[[Mega Man Battle Network (video game)|Mega Man Battle Network]] ''=== |
===''[[Mega Man Battle Network (video game)|Mega Man Battle Network]] ''=== |
||
''(Known as '''Mettool''' in the first game)'' |
''(Known as '''Mettool''' in the first game)'' |
||
| Line 88: | Line 98: | ||
|} |
|} |
||
| − | ===''[[Mega Man Network Transmission]] |
+ | ===''[[Mega Man Network Transmission]]''=== |
{|border="1" cellpadding="3" cellspacing="0" style="width: 100%; background-color: #F8F8FF; border-collapse:collapse; line-height: normal; font-size:95%; border: 2px solid #1466B8;" |
{|border="1" cellpadding="3" cellspacing="0" style="width: 100%; background-color: #F8F8FF; border-collapse:collapse; line-height: normal; font-size:95%; border: 2px solid #1466B8;" |
||
|rowspan="3"|<center>'''Mettaur1'''</center> |
|rowspan="3"|<center>'''Mettaur1'''</center> |
||
| Line 148: | Line 158: | ||
|- |
|- |
||
!style="color:#FCFCFC; background-color: #104E8B;"|Dropped: |
!style="color:#FCFCFC; background-color: #104E8B;"|Dropped: |
||
| − | |colspan="5"| |
+ | |colspan="5"|Shockwav (H, J, L, R, U), Guard (*) |
|- |
|- |
||
!style="color:#FCFCFC; background-color: #104E8B;"|Location: |
!style="color:#FCFCFC; background-color: #104E8B;"|Location: |
||
| + | |colspan="5"|Den Area 1/2/3, Mayl's PC, Yai's PC, Bear, Bomb Comp 1/2, Doghouse, Gas Comp 1/2, Gas Stove, Okuden Guardian, School Blackboard, Yai's Telephone |
||
| − | |colspan="5"| |
||
|- |
|- |
||
|rowspan="3"|<center>'''Mettaur2'''</center> |
|rowspan="3"|<center>'''Mettaur2'''</center> |
||
| Line 163: | Line 173: | ||
|- |
|- |
||
!style="color:#FCFCFC; background-color: #104E8B;"|Dropped: |
!style="color:#FCFCFC; background-color: #104E8B;"|Dropped: |
||
| − | |colspan="5"| |
+ | |colspan="5"|Sonicwav (E, I, W), Guard (*) |
|- |
|- |
||
!style="color:#FCFCFC; background-color: #104E8B;"|Location: |
!style="color:#FCFCFC; background-color: #104E8B;"|Location: |
||
| + | |colspan="5"|Koto Area, Netopia 1/2, Yumland 1/2, Ameroupe Hotel Refrigerator, Bear, Mother Comp 1/2 |
||
| − | |colspan="5"| |
||
|- |
|- |
||
|rowspan="3"|<center>'''Mettaur3'''</center> |
|rowspan="3"|<center>'''Mettaur3'''</center> |
||
| Line 181: | Line 191: | ||
|- |
|- |
||
!style="color:#FCFCFC; background-color: #104E8B;"|Location: |
!style="color:#FCFCFC; background-color: #104E8B;"|Location: |
||
| − | |colspan="5"| |
+ | |colspan="5"|Netopia 1, Undernet 3, Air Comp 1/3/4/5 |
|} |
|} |
||
| Line 211: | Line 221: | ||
|- |
|- |
||
!style="color:#FCFCFC; background-color: #104E8B;"|Dropped: |
!style="color:#FCFCFC; background-color: #104E8B;"|Dropped: |
||
| − | |colspan="5"|SonicWave |
+ | |colspan="5"|SonicWave(G,M,W) |
|- |
|- |
||
!style="color:#FCFCFC; background-color: #104E8B;"|Location: |
!style="color:#FCFCFC; background-color: #104E8B;"|Location: |
||
| − | |colspan="5"| |
+ | |colspan="5"|Zoo Comp 2 |
|- |
|- |
||
|rowspan="3"|<center>'''Mettaur3'''</center> |
|rowspan="3"|<center>'''Mettaur3'''</center> |
||
| Line 352: | Line 362: | ||
|- |
|- |
||
!style="color:#FCFCFC; background-color: #104E8B;"|Dropped: |
!style="color:#FCFCFC; background-color: #104E8B;"|Dropped: |
||
| − | |colspan="5"|Guard1 |
+ | |colspan="5"|Guard1 (A, D, K) |
|- |
|- |
||
!style="color:#FCFCFC; background-color: #104E8B;"|Location: |
!style="color:#FCFCFC; background-color: #104E8B;"|Location: |
||
| Line 367: | Line 377: | ||
|- |
|- |
||
!style="color:#FCFCFC; background-color: #104E8B;"|Dropped: |
!style="color:#FCFCFC; background-color: #104E8B;"|Dropped: |
||
| − | |colspan="5"|Guard1 |
+ | |colspan="5"|Guard1 (A, *) |
|- |
|- |
||
!style="color:#FCFCFC; background-color: #104E8B;"|Location: |
!style="color:#FCFCFC; background-color: #104E8B;"|Location: |
||
| Line 382: | Line 392: | ||
|- |
|- |
||
!style="color:#FCFCFC; background-color: #104E8B;"|Dropped: |
!style="color:#FCFCFC; background-color: #104E8B;"|Dropped: |
||
| − | |colspan="5"|Guard2 |
+ | |colspan="5"|Guard2 (B, L, Q) |
|- |
|- |
||
!style="color:#FCFCFC; background-color: #104E8B;"|Location: |
!style="color:#FCFCFC; background-color: #104E8B;"|Location: |
||
| − | |colspan="5"| |
+ | |colspan="5"|Replaces Mettaur while gate to Nebula Area 1 is open |
|- |
|- |
||
|rowspan="3"|<center>'''Mettaur2EX'''</center> |
|rowspan="3"|<center>'''Mettaur2EX'''</center> |
||
| Line 397: | Line 407: | ||
|- |
|- |
||
!style="color:#FCFCFC; background-color: #104E8B;"|Dropped: |
!style="color:#FCFCFC; background-color: #104E8B;"|Dropped: |
||
| − | |colspan="5"|Guard2 |
+ | |colspan="5"|Guard2 (B, *) |
|- |
|- |
||
!style="color:#FCFCFC; background-color: #104E8B;"|Location: |
!style="color:#FCFCFC; background-color: #104E8B;"|Location: |
||
| − | |colspan="5"| |
+ | |colspan="5"|Replaces MettEX while gate to Nebula Area 1 is open |
|- |
|- |
||
|rowspan="3"|<center>'''Mettaur3'''</center> |
|rowspan="3"|<center>'''Mettaur3'''</center> |
||
| Line 412: | Line 422: | ||
|- |
|- |
||
!style="color:#FCFCFC; background-color: #104E8B;"|Dropped: |
!style="color:#FCFCFC; background-color: #104E8B;"|Dropped: |
||
| − | |colspan="5"|Guard3 |
+ | |colspan="5"|Guard3 (C, M, S) |
|- |
|- |
||
!style="color:#FCFCFC; background-color: #104E8B;"|Location: |
!style="color:#FCFCFC; background-color: #104E8B;"|Location: |
||
| + | |colspan="5"|Replaces Mettaur while gates to Nebula Areas 1 and 4 are open |
||
| − | |colspan="5"|ACDC Erea |
||
|- |
|- |
||
|rowspan="3"|<center>'''Mettaur3EX'''</center> |
|rowspan="3"|<center>'''Mettaur3EX'''</center> |
||
| Line 427: | Line 437: | ||
|- |
|- |
||
!style="color:#FCFCFC; background-color: #104E8B;"|Dropped: |
!style="color:#FCFCFC; background-color: #104E8B;"|Dropped: |
||
| − | |colspan="5"|Guard3 |
+ | |colspan="5"|Guard3 (C, *) |
|- |
|- |
||
!style="color:#FCFCFC; background-color: #104E8B;"|Location: |
!style="color:#FCFCFC; background-color: #104E8B;"|Location: |
||
| + | |colspan="5"|Replaces MettEX while gates to Nebula Areas 1 and 4 are open |
||
| − | |colspan="5"|NebulaArea 3, Liberation Mission 9,Under Net locations (when nebula erea 3 gate is open along with nebula erea 1's gate) |
||
|} |
|} |
||
| Line 449: | Line 459: | ||
|- |
|- |
||
!style="color:#FCFCFC; background-color: #104E8B;"|Location: |
!style="color:#FCFCFC; background-color: #104E8B;"|Location: |
||
| + | |colspan="5"| CentralArea 1/2/3, Class6-1Comp, Class1-1Comp, ToiletComp |
||
| − | |colspan="5"| |
||
|- |
|- |
||
|rowspan="3"|<center>'''Mettaur2'''</center> |
|rowspan="3"|<center>'''Mettaur2'''</center> |
||
| Line 464: | Line 474: | ||
|- |
|- |
||
!style="color:#FCFCFC; background-color: #104E8B;"|Location: |
!style="color:#FCFCFC; background-color: #104E8B;"|Location: |
||
| − | |colspan="5"| |
+ | |colspan="5"| ToiletComp (only the ToolPgrm battle) |
|- |
|- |
||
|rowspan="3"|<center>'''Mettaur3'''</center> |
|rowspan="3"|<center>'''Mettaur3'''</center> |
||
| Line 525: | Line 535: | ||
!style="color:#FCFCFC; background-color: #104E8B;"|Location: |
!style="color:#FCFCFC; background-color: #104E8B;"|Location: |
||
|colspan="5"| |
|colspan="5"| |
||
| + | |} |
||
| + | |||
| + | ===''[[Rockman.EXE Phantom of Network]]''=== |
||
| + | {|border="1" cellpadding="3" cellspacing="0" style="background-color: #F8F8FF; border-collapse:collapse; line-height: normal; font-size:95%; border: 2px solid #1466B8;" |
||
| + | |rowspan="3"|<center>'''Metall1'''<br>(メットール1)</center> |
||
| + | |rowspan="3"|<center>[[File:Mettaur1.png]]</center> |
||
| + | !style="color:#FCFCFC; background-color: #104E8B;"|HP: |
||
| + | |<center>40</center> |
||
| + | !style="color:#FCFCFC; background-color: #104E8B;"|Element: |
||
| + | |<center>[[Image:BC_Element_Null.png|None]]</center> |
||
| + | !style="color:#FCFCFC; background-color: #104E8B;"|Damage: |
||
| + | |<center>[[Image:BC_Element_Null.png|None]] 10</center> |
||
| + | |- |
||
| + | !style="color:#FCFCFC; background-color: #104E8B;"|Dropped: |
||
| + | |colspan="5"|ShockWave (D,J,R), MetGuard (*) |
||
| + | |- |
||
| + | !style="color:#FCFCFC; background-color: #104E8B;"|Location: |
||
| + | |colspan="5"|[[ACDC Area|Akihara Area 1-3]], [[Kanchou Area|Kanchou Area 1-2]], [[Meiru no PC no Dennou|Meiru no PC no Dennou 1-3]], [[Suidou Kanri Server no Dennou|Suidou Kanri Server no Dennou 1]], [[Battle Machine no Dennou|Battle Machine no Dennou 1-3]], [[Lan's PC|Netto no PC no Dennou]], [[TV Comp|Televi no Dennou]], [[Refrigerator Comp|Reizouko no Dennou]], [[Toy Comp|Nuigurumi no Dennou]], [[Blackboard Comp|Kokuban no Dennou]], [[Tsukue no Dennou]], [[Sensei no PC no Dennou]], [[Doghouse Comp|Inugoya no Dennou]], [[Ticket Comp|Kenbaiki no Dennou]], [[Jidou Door no Dennou]], [[Monument no Dennou]], [[Dad's Comp|Papa no PC no Dennou]], [[Touroku Machine no Dennou]], [[Kanyoushokubutsu no Dennou]] |
||
| + | |- |
||
| + | |rowspan="3"|<center>'''Metall2'''<br>(メットール2)</center> |
||
| + | |rowspan="3"|<center>[[File:Mettaur2.png]]</center> |
||
| + | !style="color:#FCFCFC; background-color: #104E8B;"|HP: |
||
| + | |<center>60</center> |
||
| + | !style="color:#FCFCFC; background-color: #104E8B;"|Element: |
||
| + | |<center>[[Image:BC_Element_Null.png|None]]</center> |
||
| + | !style="color:#FCFCFC; background-color: #104E8B;"|Damage: |
||
| + | |<center>[[Image:BC_Element_Null.png|None]] 30</center> |
||
| + | |- |
||
| + | !style="color:#FCFCFC; background-color: #104E8B;"|Dropped: |
||
| + | |colspan="5"|SonicWave (G,M,W), MetGuard (*) |
||
| + | |- |
||
| + | !style="color:#FCFCFC; background-color: #104E8B;"|Location: |
||
| + | |colspan="5"|Kanchou Area 1-2, [[Den Area|Densan Area 1-3]], [[Ura Internet (Rockman.EXE Phantom of Network)|Ura Internet 1]], Suidou Kanri Server no Dennou 1-3, Battle Machine no Dennou 1-3, [[Tent no Dennou|Tent no Dennou 1-2]], [[Butai Souchi no Dennou|Butai Souchi no Dennou 1-3]], [[IPC Server no Dennou|IPC Server no Dennou 1-4]], Kenbaiki no Dennou, Jidou Door no Dennou, Papa no PC no Dennou, [[Kanban no Dennou]], [[Traffic Light Comp|Shingouki no Dennou]], Kanyoushokubutsu no Dennou, [[Zaseki no Dennou]], [[Shingata PET no Dennou]], [[Kanri System no Dennou]], [[Antenna Comp|Antenna no Dennou]] |
||
| + | |- |
||
| + | |rowspan="3"|<center>'''Metall3'''<br>(メットール3)</center> |
||
| + | |rowspan="3"|<center>[[File:Mettaur3.png]]</center> |
||
| + | !style="color:#FCFCFC; background-color: #104E8B;"|HP: |
||
| + | |<center>120</center> |
||
| + | !style="color:#FCFCFC; background-color: #104E8B;"|Element: |
||
| + | |<center>[[Image:BC_Element_Null.png|None]]</center> |
||
| + | !style="color:#FCFCFC; background-color: #104E8B;"|Damage: |
||
| + | |<center>[[Image:BC_Element_Null.png|None]] 60</center> |
||
| + | |- |
||
| + | !style="color:#FCFCFC; background-color: #104E8B;"|Dropped: |
||
| + | |colspan="5"|DynaWave (E,Q,T), MetGuard (*) |
||
| + | |- |
||
| + | !style="color:#FCFCFC; background-color: #104E8B;"|Location: |
||
| + | |colspan="5"|Ura Internet 3-4, [[Mobile Area no Dennou|Mobile Area no Dennou 1-4]], [[Dennou Sekai no Ana no Dennou|Dennou Sekai no Ana no Dennou 1-4]], [[Security Server no Dennou|Security Server no Dennou 1-2]], [[Cache Server no Dennou|Cache Server no Dennou 1-4]] |
||
| + | |- |
||
| + | |width="130" rowspan="3"|<center>'''MetallSP'''<br>(メットールSP)</center> |
||
| + | |rowspan="3"|<center>[[File:MettaurOmega.png]]</center> |
||
| + | !style="color:#FCFCFC; background-color: #104E8B;"|HP: |
||
| + | |<center>180</center> |
||
| + | !style="color:#FCFCFC; background-color: #104E8B;"|Element: |
||
| + | |<center>[[Image:BC_Element_Null.png|None]]</center> |
||
| + | !style="color:#FCFCFC; background-color: #104E8B;"|Damage: |
||
| + | |<center>[[Image:BC_Element_Null.png|None]] 90</center> |
||
| + | |- |
||
| + | !style="color:#FCFCFC; background-color: #104E8B;"|Dropped: |
||
| + | |colspan="5"|DynaWave (E,Q,T), MetGuard (*) |
||
| + | |- |
||
| + | !style="color:#FCFCFC; background-color: #104E8B;"|Location: |
||
| + | |colspan="5"|Cache Server no Dennou 5, Ura Internet 2,5, [[Secret Area|Secret Area 1]] |
||
|} |
|} |
||
| Line 531: | Line 604: | ||
==Battle Chips== |
==Battle Chips== |
||
| − | The Mettaur family has two types of Battle Chips. |
+ | The Mettaur family has basically two types of Battle Chips, one for attack and other for counterattack. |
[[File:NTChip041.png|right|Shockwave]] |
[[File:NTChip041.png|right|Shockwave]] |
||
| − | The Battle Chips {{Nihongo|'''Shock Wave'''|ショックウェーブ| |
+ | The Battle Chips {{Nihongo|'''Shock Wave'''/'''Shockwave'''|ショックウェーブ|Shokku Wēbu}}, {{Nihongo|'''Sonic Wave'''|ソニックウェーブ|Sonikku Wēbu}}, {{Nihongo|'''Dyna Wave'''|ダイナウェーブ|Daina Wēbu}}, are a non-elemental attack where the user swings a pick to send a shockwave forward. The shockwave can pierce some defenses, but as it moves in the ground, hole [[panel]]s will stop them. |
| − | '''Big Wave''', known as {{Nihongo|'''Great Wave'''|グレートウェーブ|}} in Japan, is a stronger version that cracks the panels it passes by. It only appears in ''Mega Man Battle Network 3'', being obtained from Mettaur3 if MegaMan has [[Style Change|Custom Style]]. |
+ | '''Big Wave''', known as {{Nihongo|'''Great Wave'''|グレートウェーブ|Gurēto Wēbu}} in Japan, is a stronger version that cracks the panels it passes by. It only appears in ''Mega Man Battle Network 3'', being obtained from Mettaur3 if MegaMan has [[Style Change|Custom Style]]. |
[[File:NTChip090.png|right|MetGuard]] |
[[File:NTChip090.png|right|MetGuard]] |
||
| − | {{Nihongo|'''Met Guard'''|メットガード|Metto Gādo}}, also known as '''Guard''', is a Battle Chip that repels an enemy's attack as a shockwave attack, unless attacked by the enemy's body. For example, Guard cannot block [[Fishy]]'s and [[Powie]]'s attacks, as they directly hit the player rather than firing a projectile. In the first game there is a Battle Chip named {{Nihongo|'''Buster Guard'''|バスターガード|}} that allows the user to use Met Guard several times for 1 turn. |
+ | {{Nihongo|'''Met Guard'''|メットガード|Metto Gādo}}, also known as '''Guard''', is a Battle Chip that repels an enemy's attack as a shockwave attack, unless attacked by the enemy's body. For example, Guard cannot block [[Fishy]]'s and [[Powie]]'s attacks, as they directly hit the player rather than firing a projectile. In the first game there is a Battle Chip named {{Nihongo|'''Buster Guard'''|バスターガード|Basutā Gādo}} that allows the user to use Met Guard several times for 1 turn. In ''[[Mega Man Network Transmission]]'', it has two variations from different enemies, the {{Nihongo|'''Shield Guard'''|シールドガード|Shīrudo Gādo}} dropped by [[Shield Attacker]] and {{Nihongo|'''High Guard'''|ハイガード|Basutā Gādo}} dropped by [[Sniper Joe]]. |
| − | Met Guard chips are replaced by the {{Nihongo|''' |
+ | Met Guard chips are replaced by the '''Reflector''' (roughly {{Nihongo|"'''ReflecMet'''"|リフレクメット|Rifureku Metto}} in Japan) family in the sixth game. It acts the same way, but instead of shockwaves, it releases a fast chain of explosions that aren't stopped by holes. |
===''Mega Man Battle Network''=== |
===''Mega Man Battle Network''=== |
||
| + | {|border="1" cellpadding="3" cellspacing="0" style="background-color: #F8F8FF; border-collapse:collapse; line-height: normal; font-size:95%; border: 2px solid #1466B8;" |
||
| − | {|border=1 |
||
| + | !width="10" style="color: black; border:1px solid #FFC233; background-color: #FFC233;"|ID |
||
| − | !ID!!colspan=2|Battle Chip!!Description!!Attack!!Element!!Codes!!Rarity |
||
| + | !width="10" style="color:#FCFCFC; background-color: #104E8B;"|Image |
||
| + | !width="120" style="color:#FCFCFC; background-color: #104E8B;" colspan=2|[[Battle Chip|<font color="#FCFCFC">Battle Chip</font>]] |
||
| + | !width="90" style="color:#FCFCFC; background-color: #104E8B;"|Description |
||
| + | !style="color:#FCFCFC; background-color: #104E8B;"|Attack |
||
| + | !width="40" style="color:#FCFCFC; background-color: #104E8B;"|<span class="explain" title="Code(s)">Code</span> |
||
| + | !style="color:#FCFCFC; background-color: #104E8B;"|Rarity |
||
|- |
|- |
||
| + | |style="background-color:#104E8B; font-weight:bold; color:#FFC233;"|023 |
||
| − | |023||[[File:MMBNChip023.png]]||ShokWave |
||
| − | + | |[[File:MMBNChip023.png]] |
|
| + | |style="text-align: right;"|[[File:Battle Chip icon Shock Wave.png]] |
||
| − | |C,K,L,N,P||* |
||
| + | |'''ShokWave'''<br>(ショックウェーブ) |
||
| + | |Piercing<br>ground<br>wave |
||
| + | |style="text-align: center;"|'''{{W|none}} 60''' |
||
| + | |C,K,L,N,P||<big>⋆••••</big> |
||
|- |
|- |
||
| + | |style="background-color:#104E8B; font-weight:bold; color:#FFC233;"|024 |
||
| − | |024||[[File:MMBNChip024.png]]||SoniWave |
||
| − | + | |[[File:MMBNChip024.png]] |
|
| + | |style="text-align: right;"|[[File:Battle Chip icon Sonic Wave.png]] |
||
| − | |C,D,J,M,S||** |
||
| + | |'''SoniWave'''<br>(ソニックウェーブ) |
||
| + | |Piercing<br>ground<br>wave |
||
| + | |style="text-align: center;"|'''{{W|none}} 80''' |
||
| + | |C,D,J,M,S||<big>⋆⋆•••</big> |
||
|- |
|- |
||
| + | |style="background-color:#104E8B; font-weight:bold; color:#FFC233;"|025 |
||
| − | |025||[[File:MMBNChip025.png]]||DynaWave |
||
| − | + | |[[File:MMBNChip025.png]] |
|
| + | |style="text-align: right;"|[[File:Battle Chip icon Dyna Wave.png]] |
||
| − | |C,E,M,R,S||*** |
||
| + | |'''DynaWave'''<br>(ダイナウェーブ) |
||
| + | |Piercing<br>ground<br>wave |
||
| + | |style="text-align: center;"|'''{{W|none}} 100''' |
||
| + | |C,E,M,R,S||<big>⋆⋆⋆••</big> |
||
|- |
|- |
||
| + | |style="background-color:#104E8B; font-weight:bold; color:#FFC233;"|067 |
||
| − | |067||[[File:MMBNChip067.png]]||MetGuard |
||
| + | |[[File:MMBNChip067.png]] |
||
| − | |Hold A Btn for 3 sec defense!|| - ||[[File:BC Element Null.png]] None |
||
| + | |style="text-align: right;"|[[File:Battle Chip icon Met Guard.png]] |
||
| − | |A,C,E,G,L||* |
||
| + | |'''MetGuard'''<br>(メットガード) |
||
| + | |Hold A Btn<br>for 3 sec<br>defense! |
||
| + | |style="text-align: center;"|'''{{W|none}} -''' |
||
| + | |A,C,E,G,L||<big>⋆••••</big> |
||
|- |
|- |
||
| + | |style="background-color:#104E8B; font-weight:bold; color:#FFC233;"|107 |
||
| − | |107||[[File:MMBNChip107.png]]||BstrGard |
||
| − | + | |[[File:MMBNChip107.png]] |
|
| + | |style="text-align: right;"|[[File:Battle Chip icon Buster Guard.png]] |
||
| − | |A||*** |
||
| + | |'''BstrGard'''<br>(バスターガード) |
||
| + | |1-turn of<br>MetGuard<br>w/ B Btn. |
||
| + | |style="text-align: center;"|'''{{W|none}} -''' |
||
| + | |A||<big>⋆⋆⋆••</big> |
||
| + | |} |
||
| + | |||
| + | ===''Mega Man Battle Network 2''=== |
||
| + | {|border="1" cellpadding="3" cellspacing="0" style="background-color: #F8F8FF; border-collapse:collapse; line-height: normal; font-size:95%; border: 2px solid #1466B8;" |
||
| + | !width="10" style="color: black; border:1px solid #FFC233; background-color: #FFC233;"|ID |
||
| + | !width="10" style="color:#FCFCFC; background-color: #104E8B;"|Image |
||
| + | !width="70" style="color:#FCFCFC; background-color: #104E8B;" colspan=2|[[Battle Chip|<font color="#FCFCFC">Battle Chip</font>]] |
||
| + | !style="color:#FCFCFC; background-color: #104E8B;"|Description |
||
| + | !style="color:#FCFCFC; background-color: #104E8B;"|Attack |
||
| + | !width="40" style="color:#FCFCFC; background-color: #104E8B;"|<span class="explain" title="Code(s)">Code</span> |
||
| + | !width="10" style="color:#FCFCFC; background-color: #104E8B;"|<span class="explain" title="Capacity">MB</span> |
||
| + | !style="color:#FCFCFC; background-color: #104E8B;"|Rarity |
||
| + | |- |
||
| + | |style="background-color:#104E8B; font-weight:bold; color:#FFC233;"|040 |
||
| + | |[[File:MMBN2Chip040.png]] |
||
| + | |style="text-align: right;"|[[File:Battle Chip icon Shock Wave.png]] |
||
| + | |'''Shockwav'''<br>(ショックウェーブ) |
||
| + | |Shock goes<br>through<br>enemies |
||
| + | |style="text-align: center;"|'''{{W|none}} 40''' |
||
| + | |H,J,L,R,U |
||
| + | |style="text-align: center;"|10||<big>⋆••••</big> |
||
| + | |- |
||
| + | |style="background-color:#104E8B; font-weight:bold; color:#FFC233;"|041 |
||
| + | |[[File:MMBN2Chip041.png]] |
||
| + | |style="text-align: right;"|[[File:Battle Chip icon Sonic Wave.png]] |
||
| + | |'''Sonicwav'''<br>(ソニックウェーブ) |
||
| + | |Shock goes<br>through<br>enemies |
||
| + | |style="text-align: center;"|'''{{W|none}} 60''' |
||
| + | |E,I,M,S,W |
||
| + | |style="text-align: center;"|30||<big>⋆⋆•••</big> |
||
| + | |- |
||
| + | |style="background-color:#104E8B; font-weight:bold; color:#FFC233;"|042 |
||
| + | |[[File:MMBN2Chip042.png]] |
||
| + | |style="text-align: right;"|[[File:Battle Chip icon Dyna Wave.png]] |
||
| + | |'''Dynawave'''<br>(ダイナウェーブ) |
||
| + | |Shock goes<br>through<br>enemies |
||
| + | |style="text-align: center;"|'''{{W|none}} 90''' |
||
| + | |G,N,Q,T,V |
||
| + | |style="text-align: center;"|50||<big>⋆⋆⋆••</big> |
||
| + | |- |
||
| + | |style="background-color:#104E8B; font-weight:bold; color:#FFC233;"|114 |
||
| + | |[[File:MMBN2Chip114.png]] |
||
| + | |style="text-align: right;"|[[File:Battle Chip icon Met Guard.png]] |
||
| + | |'''Guard'''<br>(メットガード<br>'''MetGuard''') |
||
| + | |Repel the<br>enemy's<br>attack |
||
| + | |style="text-align: center;"|'''{{W|none}} -''' |
||
| + | |* |
||
| + | |style="text-align: center;"|2||<big>⋆••••</big> |
||
| + | |} |
||
| + | |||
| + | ===''Mega Man Battle Network 3''=== |
||
| + | {|border="1" cellpadding="3" cellspacing="0" style="background-color: #F8F8FF; border-collapse:collapse; line-height: normal; font-size:95%; border: 2px solid #1466B8;" |
||
| + | !width="10" style="color: black; border:1px solid #FFC233; background-color: #FFC233;"|ID |
||
| + | !width="10" style="color:#FCFCFC; background-color: #104E8B;"|Image |
||
| + | !width="120" style="color:#FCFCFC; background-color: #104E8B;" colspan=2|[[Battle Chip|<font color="#FCFCFC">Battle Chip</font>]] |
||
| + | !width="90" style="color:#FCFCFC; background-color: #104E8B;"|Description |
||
| + | !style="color:#FCFCFC; background-color: #104E8B;"|Attack |
||
| + | !width="40" style="color:#FCFCFC; background-color: #104E8B;"|<span class="explain" title="Code(s)">Code</span> |
||
| + | !width="10" style="color:#FCFCFC; background-color: #104E8B;"|<span class="explain" title="Capacity">MB</span> |
||
| + | !style="color:#FCFCFC; background-color: #104E8B;"|Rarity |
||
| + | |- |
||
| + | |style="background-color:#104E8B; font-weight:bold; color:#FFC233;"|Standard<br>044 |
||
| + | |[[File:MMBN3SChip044.png]] |
||
| + | |style="text-align: right;"|[[File:Battle Chip icon Shock Wave.png]] |
||
| + | |'''ShockWav'''<br>(ショックウェーブ) |
||
| + | |Shock<br>through<br>enemies |
||
| + | |style="text-align: center;"|'''{{W|none}} 60''' |
||
| + | |D,H,J,L,R |
||
| + | |style="text-align: center;"|10||<big>⋆••••</big> |
||
| + | |- |
||
| + | |style="background-color:#104E8B; font-weight:bold; color:#FFC233;"|Standard<br>045 |
||
| + | |[[File:MMBN3SChip045.png]] |
||
| + | |style="text-align: right;"|[[File:Battle Chip icon Sonic Wave.png]] |
||
| + | |'''SonicWav'''<br>(ソニックウェーブ) |
||
| + | |Shock<br>through<br>enemies |
||
| + | |style="text-align: center;"|'''{{W|none}} 80''' |
||
| + | |G,I,M,S,W |
||
| + | |style="text-align: center;"|26||<big>⋆⋆•••</big> |
||
| + | |- |
||
| + | |style="background-color:#104E8B; font-weight:bold; color:#FFC233;"|Standard<br>046 |
||
| + | |[[File:MMBN3SChip046.png]] |
||
| + | |style="text-align: right;"|[[File:Battle Chip icon Dyna Wave.png]] |
||
| + | |'''DynaWave'''<br>(ダイナウェーブ) |
||
| + | |Shock<br>through<br>enemies |
||
| + | |style="text-align: center;"|'''{{W|none}} 100''' |
||
| + | |E,N,Q,T,V |
||
| + | |style="text-align: center;"|42||<big>⋆⋆⋆••</big> |
||
| + | |- |
||
| + | |style="background-color:#104E8B; font-weight:bold; color:#FFC233;"|Standard<br>047 |
||
| + | |[[File:MMBN3SChip047.png]] |
||
| + | |style="text-align: right;"|[[File:Battle Chip icon Big Wave.png]] |
||
| + | |'''BigWave'''<br>(グレートウェーブ<br>'''GreatWave''') |
||
| + | |Shck wave<br>cracks<br>panels |
||
| + | |style="text-align: center;"|'''{{W|none}} 190''' |
||
| + | |E,J,M,P,Y |
||
| + | |style="text-align: center;"|82||<big>⋆⋆⋆⋆•</big> |
||
| + | |- |
||
| + | |style="background-color:#104E8B; font-weight:bold; color:#FFC233;"|Standard<br>133 |
||
| + | |[[File:MMBN3SChip133.png]] |
||
| + | |style="text-align: right;"|[[File:Battle Chip icon Met Guard.png]] |
||
| + | |'''Guard'''<br>(メットガード<br>'''MetGuard''') |
||
| + | |Repels<br>enemy's<br>attack |
||
| + | |style="text-align: center;"|'''{{W|none}} -''' |
||
| + | |* |
||
| + | |style="text-align: center;"|5||<big>⋆••••</big> |
||
| + | |- |
||
| + | |style="background-color:#104E8B; font-weight:bold; color:#FFC233;"|Standard<br>174 |
||
| + | |[[File:MMBN3SChip174.png]] |
||
| + | |style="text-align: right;"|[[File:Battle Chip icon Mettaur.png]] |
||
| + | |'''Mettaur'''<br>(メットール<br>'''Metall''') |
||
| + | |Summons a<br>Mettaur<br>to fight! |
||
| + | |style="text-align: center;"|'''{{W|none}} ????''' |
||
| + | |E,L,M,O,T |
||
| + | |style="text-align: center;"|30||<big>⋆⋆⋆⋆⋆</big> |
||
| + | |} |
||
| + | |||
| + | ===''Mega Man Battle Network 4''=== |
||
| + | {|border="1" cellpadding="3" cellspacing="0" style="background-color: #F8F8FF; border-collapse:collapse; line-height: normal; font-size:95%; border: 2px solid #1466B8;" |
||
| + | !width="10" style="color: black; border:1px solid #FFC233; background-color: #FFC233;"|ID |
||
| + | !width="10" style="color:#FCFCFC; background-color: #104E8B;"|Image |
||
| + | !width="120" style="color:#FCFCFC; background-color: #104E8B;" colspan=2|[[Battle Chip|<font color="#FCFCFC">Battle Chip</font>]] |
||
| + | !width="90" style="color:#FCFCFC; background-color: #104E8B;"|Description |
||
| + | !style="color:#FCFCFC; background-color: #104E8B;"|Attack |
||
| + | !width="40" style="color:#FCFCFC; background-color: #104E8B;"|<span class="explain" title="Code(s)">Code</span> |
||
| + | !width="10" style="color:#FCFCFC; background-color: #104E8B;"|<span class="explain" title="Capacity">MB</span> |
||
| + | !style="color:#FCFCFC; background-color: #104E8B;"|Rarity |
||
| + | |- |
||
| + | |style="background-color:#104E8B; font-weight:bold; color:#FFC233;"|Standard<br>103 |
||
| + | |[[File:BN4Chip103.png]] |
||
| + | |style="text-align: right;"|[[File:Battle Chip icon Met Guard.png]] |
||
| + | |'''Guard1'''<br>(メットガード1<br>'''MetGuard1''') |
||
| + | |Repels<br>enemy's<br>attack |
||
| + | |style="text-align: center;"|'''{{W|none}} 50''' |
||
| + | |A,L,V,* |
||
| + | |style="text-align: center;"|4||<big>⋆••••</big> |
||
| + | |- |
||
| + | |style="background-color:#104E8B; font-weight:bold; color:#FFC233;"|Standard<br>104 |
||
| + | |[[File:BN4Chip104.png]] |
||
| + | |style="text-align: right;"|[[File:Battle Chip icon Met Guard 2.png]] |
||
| + | |'''Guard2'''<br>(メットガード2<br>'''MetGuard2''') |
||
| + | |Repels<br>enemy's<br>attack |
||
| + | |style="text-align: center;"|'''{{W|none}} 80''' |
||
| + | |C,G,P,* |
||
| + | |style="text-align: center;"|10||<big>⋆⋆•••</big> |
||
| + | |- |
||
| + | |style="background-color:#104E8B; font-weight:bold; color:#FFC233;"|Standard<br>105 |
||
| + | |[[File:BN4Chip105.png]] |
||
| + | |style="text-align: right;"|[[File:Battle Chip icon Met Guard 3.png]] |
||
| + | |'''Guard3'''<br>(メットガード3<br>'''MetGuard3''') |
||
| + | |Repels<br>enemy's<br>attack |
||
| + | |style="text-align: center;"|'''{{W|none}} 110''' |
||
| + | |F,R,T,* |
||
| + | |style="text-align: center;"|16||<big>⋆⋆⋆••</big> |
||
| + | |} |
||
| + | |||
| + | ===''Rockman EXE4.5 Real Operation''=== |
||
| + | {|border="1" cellpadding="3" cellspacing="0" style="background-color: #F8F8FF; border-collapse:collapse; line-height: normal; font-size:95%; border: 2px solid #1466B8;" |
||
| + | !width="10" style="color: black; border:1px solid #FFC233; background-color: #FFC233;"|ID |
||
| + | !width="10" style="color:#FCFCFC; background-color: #104E8B;"|Image |
||
| + | !style="color:#FCFCFC; background-color: #104E8B;" colspan=2|[[Battle Chip|<font color="#FCFCFC">Battle Chip</font>]] |
||
| + | !width="150" style="color:#FCFCFC; background-color: #104E8B;"|Description |
||
| + | !width="150" style="color:#FCFCFC; background-color: #104E8B;"|Translation |
||
| + | !style="color:#FCFCFC; background-color: #104E8B;"|Attack |
||
| + | !width="10" style="color:#FCFCFC; background-color: #104E8B;"|<span class="explain" title="Capacity">MB</span> |
||
| + | !style="color:#FCFCFC; background-color: #104E8B;"|Rarity |
||
| + | |- |
||
| + | |style="background-color:#104E8B; font-weight:bold; color:#FFC233;"|Standard<br>103 |
||
| + | |[[File:BN45Chip103.png]] |
||
| + | |style="text-align: right;"|[[File:Battle Chip icon Met Guard.png]] |
||
| + | |'''Met Guard 1'''<br>(メットガード1) |
||
| + | |タイミングガードし<br>攻撃をしょうげきは<br>にしてはねかえす! |
||
| + | |By timing guard, repel an attack with a shock wave! |
||
| + | |style="text-align: center;"|'''{{W|none}} 50''' |
||
| + | |style="text-align: center;"|4||<big>⋆••••</big> |
||
| + | |- |
||
| + | |style="background-color:#104E8B; font-weight:bold; color:#FFC233;"|Standard<br>104 |
||
| + | |[[File:BN45Chip104.png]] |
||
| + | |style="text-align: right;"|[[File:Battle Chip icon Met Guard 2.png]] |
||
| + | |'''Met Guard 2'''<br>(メットガード2) |
||
| + | |タイミングガードし<br>攻撃をしょうげきは<br>にしてはねかえす! |
||
| + | |By timing guard, repel an attack with a shock wave! |
||
| + | |style="text-align: center;"|'''{{W|none}} 90''' |
||
| + | |style="text-align: center;"|10||<big>⋆⋆•••</big> |
||
| + | |- |
||
| + | |style="background-color:#104E8B; font-weight:bold; color:#FFC233;"|Standard<br>105 |
||
| + | |[[File:BN45Chip105.png]] |
||
| + | |style="text-align: right;"|[[File:Battle Chip icon Met Guard 3.png]] |
||
| + | |'''Met Guard 3'''<br>(メットガード3) |
||
| + | |タイミングガードし<br>攻撃をしょうげきは<br>にしてはねかえす! |
||
| + | |By timing guard, repel an attack with a shock wave! |
||
| + | |style="text-align: center;"|'''{{W|none}} 110''' |
||
| + | |style="text-align: center;"|16||<big>⋆⋆⋆••</big> |
||
| + | |} |
||
| + | |||
| + | ===''Mega Man Battle Network 5''=== |
||
| + | {|border="1" cellpadding="3" cellspacing="0" style="background-color: #F8F8FF; border-collapse:collapse; line-height: normal; font-size:95%; border: 2px solid #1466B8;" |
||
| + | !width="10" style="color: black; border:1px solid #FFC233; background-color: #FFC233;"|ID |
||
| + | !width="10" style="color:#FCFCFC; background-color: #104E8B;"|Image |
||
| + | !width="120" style="color:#FCFCFC; background-color: #104E8B;" colspan=2|[[Battle Chip|<font color="#FCFCFC">Battle Chip</font>]] |
||
| + | !width="90" style="color:#FCFCFC; background-color: #104E8B;"|Description |
||
| + | !style="color:#FCFCFC; background-color: #104E8B;"|Attack |
||
| + | !width="40" style="color:#FCFCFC; background-color: #104E8B;"|<span class="explain" title="Code(s)">Code</span> |
||
| + | !width="10" style="color:#FCFCFC; background-color: #104E8B;"|<span class="explain" title="Capacity">MB</span> |
||
| + | !style="color:#FCFCFC; background-color: #104E8B;"|Rarity |
||
| + | |- |
||
| + | |style="background-color:#104E8B; font-weight:bold; color:#FFC233;"|Standard<br>131 |
||
| + | |[[File:BN5Chip131.png]] |
||
| + | |style="text-align: right;"|[[File:Battle Chip icon Met Guard.png]] |
||
| + | |'''Guard1'''<br>(メットガード1<br>'''MetGuard1''') |
||
| + | |Repels a<br>enemy's<br>attack |
||
| + | |style="text-align: center;"|'''{{W|none}} 50''' |
||
| + | |A,D,K,* |
||
| + | |style="text-align: center;"|4||<big>⋆••••</big> |
||
| + | |- |
||
| + | |style="background-color:#104E8B; font-weight:bold; color:#FFC233;"|Standard<br>132 |
||
| + | |[[File:BN5Chip132.png]] |
||
| + | |style="text-align: right;"|[[File:Battle Chip icon Met Guard 2.png]] |
||
| + | |'''Guard2'''<br>(メットガード2<br>'''MetGuard2''') |
||
| + | |Repels a<br>enemy's<br>attack |
||
| + | |style="text-align: center;"|'''{{W|none}} 100''' |
||
| + | |B,L,Q,* |
||
| + | |style="text-align: center;"|10||<big>⋆⋆•••</big> |
||
| + | |- |
||
| + | |style="background-color:#104E8B; font-weight:bold; color:#FFC233;"|Standard<br>133 |
||
| + | |[[File:BN5Chip133.png]] |
||
| + | |style="text-align: right;"|[[File:Battle Chip icon Met Guard 3.png]] |
||
| + | |'''Guard3'''<br>(メットガード3<br>'''MetGuard3''') |
||
| + | |Repels a<br>enemy's<br>attack |
||
| + | |style="text-align: center;"|'''{{W|none}} 150''' |
||
| + | |C,M,S,* |
||
| + | |style="text-align: center;"|16||<big>⋆⋆⋆••</big> |
||
| + | |} |
||
| + | |||
| + | ===''Mega Man Battle Network 6''=== |
||
| + | {|border="1" cellpadding="3" cellspacing="0" style="background-color: #F8F8FF; border-collapse:collapse; line-height: normal; font-size:95%; border: 2px solid #1466B8;" |
||
| + | !width="10" style="color: black; border:1px solid #FFC233; background-color: #FFC233;"|ID |
||
| + | !width="10" style="color:#FCFCFC; background-color: #104E8B;"|Image |
||
| + | !width="120" style="color:#FCFCFC; background-color: #104E8B;" colspan=2|[[Battle Chip|<font color="#FCFCFC">Battle Chip</font>]] |
||
| + | !width="90" style="color:#FCFCFC; background-color: #104E8B;"|Description |
||
| + | !style="color:#FCFCFC; background-color: #104E8B;"|Attack |
||
| + | !width="40" style="color:#FCFCFC; background-color: #104E8B;"|<span class="explain" title="Code(s)">Code</span> |
||
| + | !width="10" style="color:#FCFCFC; background-color: #104E8B;"|<span class="explain" title="Capacity">MB</span> |
||
| + | !style="color:#FCFCFC; background-color: #104E8B;"|Rarity |
||
| + | |- |
||
| + | |style="background-color:#104E8B; font-weight:bold; color:#FFC233;"|Standard<br>091 |
||
| + | |[[File:BN6Chip091.png]] |
||
| + | |style="text-align: right;"|[[File:Battle Chip icon Reflector 1.png]] |
||
| + | |'''Rflectr1'''<br>(リフレクメット1<br>'''ReflecMet3''') |
||
| + | |Bounce an<br>attck back<br>at them! |
||
| + | |style="text-align: center;"|'''{{W|none}} 60''' |
||
| + | |A,C,P,* |
||
| + | |style="text-align: center;"|7||<big>⋆••••</big> |
||
| + | |- |
||
| + | |style="background-color:#104E8B; font-weight:bold; color:#FFC233;"|Standard<br>092 |
||
| + | |[[File:BN6Chip092.png]] |
||
| + | |style="text-align: right;"|[[File:Battle Chip icon Reflector 2.png]] |
||
| + | |'''Rflectr2'''<br>(リフレクメット2<br>'''ReflecMet3''') |
||
| + | |Bounce an<br>attck back<br>at them! |
||
| + | |style="text-align: center;"|'''{{W|none}} 120''' |
||
| + | |B,G,Y,* |
||
| + | |style="text-align: center;"|16||<big>⋆⋆•••</big> |
||
| + | |- |
||
| + | |style="background-color:#104E8B; font-weight:bold; color:#FFC233;"|Standard<br>093 |
||
| + | |[[File:BN6Chip093.png]] |
||
| + | |style="text-align: right;"|[[File:Battle Chip icon Reflector 3.png]] |
||
| + | |'''Rflectr3'''<br>(リフレクメット3<br>'''ReflecMet3''') |
||
| + | |Bounce an<br>attck back<br>at them! |
||
| + | |style="text-align: center;"|'''{{W|none}} 200''' |
||
| + | |E,F,O,* |
||
| + | |style="text-align: center;"|25||<big>⋆⋆⋆••</big> |
||
|} |
|} |
||
| Line 572: | Line 941: | ||
!ID!!colspan=2|Battle Chip!!Description!!Attack!!Element!!Size!!Rarity |
!ID!!colspan=2|Battle Chip!!Description!!Attack!!Element!!Size!!Rarity |
||
|- |
|- |
||
| − | |041||[[File:NTChip041.png]]||ShockWav |
+ | |style="background-color:#104E8B; font-weight:bold; color:#FFC233;"|041||[[File:NTChip041.png]]||ShockWav |
|Smashes blocks with pickax for a shockwav attack! |
|Smashes blocks with pickax for a shockwav attack! |
||
|40||[[File:BC Element Null.png]] None |
|40||[[File:BC Element Null.png]] None |
||
|8 MB||* |
|8 MB||* |
||
|- |
|- |
||
| − | |042||[[File:NTChip042.png]]||SonicWav |
+ | |style="background-color:#104E8B; font-weight:bold; color:#FFC233;"|042||[[File:NTChip042.png]]||SonicWav |
|Smashes blocks with pickax for a shockwav attack! |
|Smashes blocks with pickax for a shockwav attack! |
||
|70||[[File:BC Element Null.png]] None |
|70||[[File:BC Element Null.png]] None |
||
| || |
| || |
||
|- |
|- |
||
| − | |043||[[File:NTChip043.png]]||DynaWav |
+ | |style="background-color:#104E8B; font-weight:bold; color:#FFC233;"|043||[[File:NTChip043.png]]||DynaWav |
|Smashes blocks with pickax for a shockwav attack! |
|Smashes blocks with pickax for a shockwav attack! |
||
|100||[[File:BC Element Null.png]] None |
|100||[[File:BC Element Null.png]] None |
||
| || |
| || |
||
|- |
|- |
||
| − | |090||[[File:NTChip090.png]]||Guard |
+ | |style="background-color:#104E8B; font-weight:bold; color:#FFC233;"|090||[[File:NTChip090.png]]||Guard |
|Can be used to convert attacks into shockwaves |
|Can be used to convert attacks into shockwaves |
||
| - ||[[File:BC Element Null.png]] None |
| - ||[[File:BC Element Null.png]] None |
||
|16 MB||* |
|16 MB||* |
||
| − | |} |
||
| − | |||
| − | ===''Mega Man Battle Network 2''=== |
||
| − | {|border=1 |
||
| − | !ID!!colspan=2|Battle Chip!!Description!!Attack!!Element!!Codes!!Size!!Rarity |
||
| − | |- |
||
| − | |040||[[File:MMBN2Chip040.png]]||Shockwav |
||
| − | |Shock goes through enemies||40||[[File:BC Element Null.png]] None |
||
| − | |H,J,L,R,U||10 MB||* |
||
| − | |- |
||
| − | |041||[[File:MMBN2Chip041.png]]||Sonicwav |
||
| − | |Shock goes through enemies||60||[[File:BC Element Null.png]] None |
||
| − | |E,I,M,S,W||30 MB||** |
||
| − | |- |
||
| − | |042||[[File:MMBN2Chip042.png]]||Dynawave |
||
| − | |Shock goes through enemies||90||[[File:BC Element Null.png]] None |
||
| − | |G,N,Q,T,V||50 MB||*** |
||
| − | |- |
||
| − | |114||[[File:MMBN2Chip114.png]]||Guard |
||
| − | |Repel the enemy's attack|| - ||[[File:BC Element Null.png]] None |
||
| − | |*||2 MB||* |
||
| − | |} |
||
| − | |||
| − | ===''Mega Man Battle Network 3''=== |
||
| − | {|border=1 |
||
| − | !ID!!colspan=2|Battle Chip!!Description!!Attack!!Element!!Codes!!Size!!Rarity |
||
| − | |- |
||
| − | |Standard Chip 044||[[File:MMBN3SChip044.png]]||ShockWav |
||
| − | |Shock through enemies||60||[[File:BC Element Null.png]] None |
||
| − | |D,H,J,L,R||10 MB||* |
||
| − | |- |
||
| − | |Standard Chip 045||[[File:MMBN3SChip045.png]]||SonicWav |
||
| − | |Shock through enemies||80||[[File:BC Element Null.png]] None |
||
| − | |G,I,M,S,W||26 MB||** |
||
| − | |- |
||
| − | |Standard Chip 046||[[File:MMBN3SChip046.png]]||DynaWave |
||
| − | |Shock through enemies||100||[[File:BC Element Null.png]] None |
||
| − | |E,N,Q,T,V||42 MB||*** |
||
| − | |- |
||
| − | |Standard Chip 047||[[File:MMBN3SChip047.png]]||BigWave |
||
| − | |Shock through enemies||190||[[File:BC Element Null.png]] None |
||
| − | |E,J,M,P,Y||82 MB||**** |
||
|- |
|- |
||
| + | |style="background-color:#104E8B; font-weight:bold; color:#FFC233;"|091||[[File:NTChip091.png]]||ShldGard |
||
| − | |Standard Chip 133||[[File:MMBN3SChip133.png]]||Guard |
||
| − | |Repels enemy's attack|| - ||[[File:BC Element Null.png]] None |
||
| − | |*||5 MB||* |
||
|- |
|- |
||
| + | |style="background-color:#104E8B; font-weight:bold; color:#FFC233;"|092||[[File:NTChip092.png]]||HiGuard |
||
| − | |Standard Chip 174||[[File:MMBN3SChip174.png]]||Mettaur |
||
| − | |Summons a Mettaur to fight!||????||[[File:BC Element Null.png]] None |
||
| − | |L,T||30 MB||***** |
||
|} |
|} |
||
| Line 665: | Line 988: | ||
|} |
|} |
||
| − | ===''Mega Man Battle Network 4''=== |
||
| − | {|border=1 |
||
| − | !ID!!colspan=2|Battle Chip!!Description!!Attack!!Element!!Codes!!Size!!Rarity |
||
| − | |- |
||
| − | |Standard Chip 103||[[File:BN4Chip103.png]]||Guard1 |
||
| − | |Repels enemy's attack||50||[[File:BC Element Null.png]] None |
||
| − | |A,L,V,*||4 MB||* |
||
| − | |- |
||
| − | |Standard Chip 104||[[File:BN4Chip104.png]]||Guard2 |
||
| − | |Repels enemy's attack||80||[[File:BC Element Null.png]] None |
||
| − | |C,G,P,*||10 MB||** |
||
| − | |- |
||
| − | |Standard Chip 105||[[File:BN4Chip105.png]]||Guard3 |
||
| − | |Repels enemy's attack||110||[[File:BC Element Null.png]] None |
||
| − | |F,R,T,*||16 MB||*** |
||
| − | |} |
||
| − | |||
| − | ===''Rockman.EXE 4.5 Real Operation''=== |
||
| − | {|border=1 |
||
| − | !ID!!colspan=2|Battle Chip!!Description translation!!Attack!!Element!!Size!!Rarity |
||
| − | |-タイミングガードし<br/>攻撃をしょうげきは<br/>にしてはねかえす! |
||
| − | |Standard Chip 103||[[File:BN4Chip103.png]]||Met Guard 1 |
||
| − | |By timing guard, repel an attack with a shock wave! |
||
| − | |50||[[File:BC Element Null.png]] None||4 MB||* |
||
| − | |- |
||
| − | |Standard Chip 104||[[File:BN4Chip104.png]]||Met Guard 2 |
||
| − | |By timing guard, repel an attack with a shock wave! |
||
| − | |80||[[File:BC Element Null.png]] None||10 MB||** |
||
| − | |- |
||
| − | |Standard Chip 105||[[File:BN4Chip105.png]]||Met Guard 3 |
||
| − | |By timing guard, repel an attack with a shock wave! |
||
| − | |110||[[File:BC Element Null.png]] None||16 MB||*** |
||
| − | |} |
||
| − | |||
| − | ===''Mega Man Battle Network 5''=== |
||
| − | {|border=1 |
||
| − | !ID!!colspan=2|Battle Chip!!Description!!Attack!!Element!!Codes!!Size!!Rarity |
||
| − | |- |
||
| − | |Standard Chip 131||[[File:BN5Chip131.png]]||Guard1 |
||
| − | |Repels a<!--an--> enemy's attack||50||[[File:BC Element Null.png]] None |
||
| − | |A,D,K,*||4 MB||* |
||
| − | |- |
||
| − | |Standard Chip 132||[[File:BN5Chip132.png]]||Guard2 |
||
| − | |Repels a enemy's attack||100||[[File:BC Element Null.png]] None |
||
| − | |B,L,Q,*||10 MB||** |
||
| − | |- |
||
| − | |Standard Chip 133||[[File:BN5Chip133.png]]||Guard3 |
||
| − | |Repels a enemy's attack||150||[[File:BC Element Null.png]] None |
||
| − | |C,M,S,*||16 MB||*** |
||
| − | |} |
||
| − | |||
| − | ===''Mega Man Battle Network 6''=== |
||
| − | {|border=1 |
||
| − | !ID!!colspan=2|Battle Chip!!Description!!Attack!!Element!!Codes!!Size!!Rarity |
||
| − | |- |
||
| − | |Standard Chip 091||[[File:BN6Chip091.png]]||Rflectr1 |
||
| − | |Bounce an attck back at them!||60||[[File:BC Element Null.png]] None |
||
| − | |A,C,P,*||7 MB||* |
||
| − | |- |
||
| − | |Standard Chip 092||[[File:BN6Chip092.png]]||Rflectr2 |
||
| − | |Bounce an attck back at them!||120||[[File:BC Element Null.png]] None |
||
| − | |B,G,Y,*||16 MB||** |
||
| − | |- |
||
| − | |Standard Chip 093||[[File:BN6Chip093.png]]||Rflectr3 |
||
| − | |Bounce an attck back at them!||200||[[File:BC Element Null.png]] None |
||
| − | |E,F,O,*||25 MB||*** |
||
| − | |} |
||
===''Rockman.EXE WS''=== |
===''Rockman.EXE WS''=== |
||
| Line 737: | Line 993: | ||
===[[Advanced PET]]=== |
===[[Advanced PET]]=== |
||
| − | [[File:BattleChip088. |
+ | [[File:BattleChip088.png|right|100px|Battle Chip #088]] |
{|border=1 |
{|border=1 |
||
!ID!!Japanese name!!English name |
!ID!!Japanese name!!English name |
||
| Line 750: | Line 1,006: | ||
==Other media== |
==Other media== |
||
===''[[MegaMan NT Warrior]]''=== |
===''[[MegaMan NT Warrior]]''=== |
||
| − | Mettaurs are a recurring virus in the anime series. A giant Mettaur appeared in the [[ |
+ | Mettaurs are a recurring virus in the anime series. A giant Mettaur appeared in the [[Duo (episode)|first episode]] of ''[[Rockman.EXE Stream]]'' and the [[Rampaging Metall|14th episode]] of ''[[Rockman.EXE Beast+]]''. In [[Beyondard]], [[Beast Out|Beast]] Mettaurs are part of [[Gregar]]'s army. |
===[[MegaMan NT Warrior (manga)|''MegaMan NT Warrior'' (manga)]]=== |
===[[MegaMan NT Warrior (manga)|''MegaMan NT Warrior'' (manga)]]=== |
||
| Line 757: | Line 1,013: | ||
==Gallery== |
==Gallery== |
||
<gallery> |
<gallery> |
||
| + | MettaurWave.png|Mettaur's Shock Wave chip. |
||
| − | MMBNMettaurs.png|thumb|Mettaurs |
||
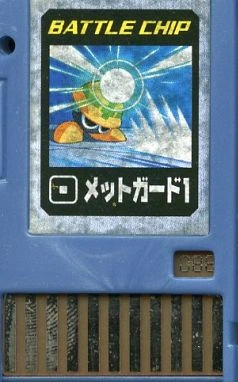
| + | MettaurGuard1.jpg|Mettaur's Guard chip. |
||
| + | MMBNMettaurs.png|Mettaur in ''Mega Man Battle Network 5: Double Team DS''' intro. |
||
| + | MMBn6Mettaur.png|Mettaur in ''Mega Man Battle Network 6''. |
||
| + | Geddon2chipart.jpg|Mettaur in Geddon 2 chip. |
||
| + | BlackBombchipart.jpg|Mettaur in Black Bomb chip. |
||
| + | CopyDamagechipart.jpg|Mettaur in Copy Damage chip. |
||
| + | CrackOutchipart.jpg|Mettaur in Crack Out chip. |
||
| + | LifeSynchrochipart.jpg|Mettaur in Life Synchro chip. |
||
| + | SideBamboo3chipart.jpg|Mettaur in Side Bamboo chip with [[Kilby]]. |
||
| + | MettVirusesEXE2Manual.png|Mettaur and other viruses. |
||
| + | Dragon Poker Metall.png|Mettaur in ''[[Dragon Poker]]'' |
||
| + | TEPPEN 3ME 022 art.png|Mettool card in ''[[TEPPEN]]'' |
||
| + | TEPPEN 3ME 031 art.png|Battle Chip—Guard card in ''TEPPEN'' |
||
MMNTWMettaur.png|Mettaurs in the anime. |
MMNTWMettaur.png|Mettaurs in the anime. |
||
BeastMettaur.png|Beast Mettaurs in the anime. |
BeastMettaur.png|Beast Mettaurs in the anime. |
||
BeastMettaurWave.png|Beast Mettaurs attacking. |
BeastMettaurWave.png|Beast Mettaurs attacking. |
||
MMNTWMMets.png|Mettaurs in the manga. |
MMNTWMMets.png|Mettaurs in the manga. |
||
| + | MMNTWMMetsUndernet.jpg|Village of Mettaurs in the manga (Vol 3). |
||
</gallery> |
</gallery> |
||
| − | == |
+ | ==See also== |
*[[Met]] |
*[[Met]] |
||
*[[Mettenna]] |
*[[Mettenna]] |
||
| + | {{-}} |
||
| − | |||
| − | {{ |
+ | {{Mmbn1}} |
{{BattleNetwork}} |
{{BattleNetwork}} |
||
[[Category:Viruses]] |
[[Category:Viruses]] |
||
| Line 779: | Line 1,049: | ||
[[Category:Mega Man Network Transmission enemies]] |
[[Category:Mega Man Network Transmission enemies]] |
||
[[Category:Rockman.EXE WS enemies]] |
[[Category:Rockman.EXE WS enemies]] |
||
| + | [[Category:Mets]] |
||
Latest revision as of 11:57, 28 February 2024
Mettaur, known as Metall (メットール Mettōru) in Japan, is a common virus type in the Mega Man Battle Network series, and the only species to have a constant appearance, while other viruses were replaced or omitted.
Characteristics
Mettaurs wear small hard hats with crosses on them and wield a pickaxe, which causes a shock wave when thrust into the ground. In the games, they move up and down the columns they are in, sending shockwaves at the player. While normal Mettaurs stand still while the other Mettaurs present attack, stronger variants hide in their helmets and are impervious to attacks (unless they come out of their helmet or are attacked by an attack that can pierce).
Game History
In Mega Man Battle Network 3, a family of Mettaurs can be caught and brought to the Virus Breeder, where a special Battle Chip can be obtained from them; upon meeting certain conditions, the omega version can also be caught. These enemies are based on the Mettaur that appeared in the mainline games.
In Mega Man Battle Network 4, in order to enter The Den Battle/City Battle Tournament, Lan and MegaMan must find the Mettaur Village and retrieve data for a test. The village's locations ends up being in a Jomon billboard Comp in Elec Town.
In Mega Man Battle Network 6, Lan and MegaMan must battle a Mettaur with a plunger stuck on its head that's disrupting their home toilet's Net.
Mettaur family
Mettaur
![]() Mettaur, known as Metall (メットール Mettōru): A small black ball with eyes, wearing a yellow hard hat with a green cross on it. Doesn't hide under its helmet.
Mettaur, known as Metall (メットール Mettōru): A small black ball with eyes, wearing a yellow hard hat with a green cross on it. Doesn't hide under its helmet.
MettaurEX
![]() Mettaur EX, known as Metall EX (メットールEX): Same as Mettaur, but with a light green hard hat and purple cross.
Mettaur EX, known as Metall EX (メットールEX): Same as Mettaur, but with a light green hard hat and purple cross.
Mettaur2
![]() Mettaur 2nd, known as Metall 2nd (メットール2 Mettōru Sekando): Same as Mettaur, but with a red-orange hard hat and dark blue cross.
Mettaur 2nd, known as Metall 2nd (メットール2 Mettōru Sekando): Same as Mettaur, but with a red-orange hard hat and dark blue cross.
Mettaur2EX
![]() Mettaur 2nd EX, known as Metall 2nd EX (メットール2EX): Has a brown hard hat and blue cross.
Mettaur 2nd EX, known as Metall 2nd EX (メットール2EX): Has a brown hard hat and blue cross.
Mettaur 3
![]() Mettaur 3rd, known as Metall 3rd (メットール3 Mettōru Sādo): Has a blue hard hat and yellow cross. Their shockwaves cracks panels.
Mettaur 3rd, known as Metall 3rd (メットール3 Mettōru Sādo): Has a blue hard hat and yellow cross. Their shockwaves cracks panels.
Mettaur3EX / MettaurΩ / MettaurSP
![]() Mettaur 3rd EX / Mettaur Omega / Mettaur SP, known as Metall 3rd EX (メットール3EX) / Metall SP (メットールSP): Has a gray hard hat and light blue cross. Their shockwaves turn panels into swamp panels.
Mettaur 3rd EX / Mettaur Omega / Mettaur SP, known as Metall 3rd EX (メットール3EX) / Metall SP (メットールSP): Has a gray hard hat and light blue cross. Their shockwaves turn panels into swamp panels.
RareMettaur
![]() Rare Mettaur, known as Rare Metall (レアメットール Rea Mettōru), known as : Has a purple hard hat and orange cross.
Rare Mettaur, known as Rare Metall (レアメットール Rea Mettōru), known as : Has a purple hard hat and orange cross.
RareMettaur2
![]() Rare Mettaur 2nd, known as Rare Metall 2nd (レアメットール Rea Mettōru Sekando): Has a light blue hard hat and dark blue cross.
Rare Mettaur 2nd, known as Rare Metall 2nd (レアメットール Rea Mettōru Sekando): Has a light blue hard hat and dark blue cross.
Virus stats by game
Mega Man Battle Network
(Known as Mettool in the first game)
| HP: | Element: | Damage: | |||||
|---|---|---|---|---|---|---|---|
| Dropped: | ShokWave (C, K), MetGuard (A, G) | ||||||
| Location: | Dog House, Oven, Dex's Computer, School 1/2/3/4/5,
Yai's Telephone, Mayl's Piano, Internet 1/2/3/13 | ||||||
| HP: | Element: | Damage: | |||||
| Dropped: | SoniWave (C, D, M), MetGuard (G) | ||||||
| Location: | Dog House, Car Outside the School, Dex's Computer,
Dex's Gamecube, Miyu's Vase, Traffic Light 1/2/3, Internet 3/6/13 | ||||||
| HP: | Element: | Damage: | |||||
| Dropped: | DynaWave (C, M, S), MetGuard (L) | ||||||
| Location: | Miyu's Vase, Traffic Light 3/4/5, Internet 5/6/7/8/13 | ||||||
Mega Man Network Transmission
| HP: | Element: | Damage: | |||||
|---|---|---|---|---|---|---|---|
| Dropped: | ShockWav, Guard | ||||||
| Location: | Den Area, Garden Comp, Power Plant Comp, Global Area | ||||||
| HP: | Element: | Damage: | |||||
| Dropped: | SonicWav, Guard | ||||||
| Location: | Arcade Comp, Old Area | ||||||
| HP: | Element: | Damage: | |||||
| Dropped: | DynaWave, Guard | ||||||
| Location: | Strange Grav Area | ||||||
Mega Man Battle Network 2
| HP: | Element: | Damage: | |||||
|---|---|---|---|---|---|---|---|
| Dropped: | Shockwav (H, J, L, R, U), Guard (*) | ||||||
| Location: | Den Area 1/2/3, Mayl's PC, Yai's PC, Bear, Bomb Comp 1/2, Doghouse, Gas Comp 1/2, Gas Stove, Okuden Guardian, School Blackboard, Yai's Telephone | ||||||
| HP: | Element: | Damage: | |||||
| Dropped: | Sonicwav (E, I, W), Guard (*) | ||||||
| Location: | Koto Area, Netopia 1/2, Yumland 1/2, Ameroupe Hotel Refrigerator, Bear, Mother Comp 1/2 | ||||||
| HP: | Element: | Damage: | |||||
| Dropped: | ??? | ||||||
| Location: | Netopia 1, Undernet 3, Air Comp 1/3/4/5 | ||||||
Mega Man Battle Network 3
| HP: | Element: | Damage: | |||||
|---|---|---|---|---|---|---|---|
| Dropped: | ShockWave (R, L, H), Guard | ||||||
| Location: | |||||||
| HP: | Element: | Damage: | |||||
| Dropped: | SonicWave(G,M,W) | ||||||
| Location: | Zoo Comp 2 | ||||||
| HP: | Element: | Damage: | |||||
| Dropped: | DynaWave | ||||||
| Location: | |||||||
| HP: | Element: | Damage: | |||||
| Dropped: | 1000 Zenny | ||||||
| Location: | |||||||
Mega Man Battle Network 4
| HP: | Element: | Damage: | |||||
|---|---|---|---|---|---|---|---|
| Dropped: | Guard1 (L, V, A) | ||||||
| Location: | |||||||
| HP: | Element: | Damage: | |||||
| Dropped: | Guard1 (L, V, A, *) | ||||||
| Location: | |||||||
| HP: | Element: | Damage: | |||||
| Dropped: | Guard2 (G, P, C) | ||||||
| Location: | |||||||
| HP: | Element: | Damage: | |||||
| Dropped: | Guard2 (G, P, C, *) | ||||||
| Location: | |||||||
| HP: | Element: | Damage: | |||||
| Dropped: | Guard3 (R, T, F) | ||||||
| Location: | |||||||
| HP: | Element: | Damage: | |||||
| Dropped: | Guard3 (R, T, F, *) | ||||||
| Location: | |||||||
Mega Man Battle Network 5
| HP: | Element: | Damage: | |||||
|---|---|---|---|---|---|---|---|
| Dropped: | Guard1 (A, D, K) | ||||||
| Location: | ACDC Area 1/2, Doghouse Comp, TreeComp, SculptureCmp, Dad'sComp, MainComp 1/2, Liberation Mission 1, Oran Area 1 | ||||||
| HP: | Element: | Damage: | |||||
| Dropped: | Guard1 (A, *) | ||||||
| Location: | DrillComp 1, SquirrelCmp, End Area 1, Liberation Mission 4 | ||||||
| HP: | Element: | Damage: | |||||
| Dropped: | Guard2 (B, L, Q) | ||||||
| Location: | Replaces Mettaur while gate to Nebula Area 1 is open | ||||||
| HP: | Element: | Damage: | |||||
| Dropped: | Guard2 (B, *) | ||||||
| Location: | Replaces MettEX while gate to Nebula Area 1 is open | ||||||
| HP: | Element: | Damage: | |||||
| Dropped: | Guard3 (C, M, S) | ||||||
| Location: | Replaces Mettaur while gates to Nebula Areas 1 and 4 are open | ||||||
| HP: | Element: | Damage: | |||||
| Dropped: | Guard3 (C, *) | ||||||
| Location: | Replaces MettEX while gates to Nebula Areas 1 and 4 are open | ||||||
Mega Man Battle Network 6
| HP: | Element: | Damage: | |||||
|---|---|---|---|---|---|---|---|
| Dropped: | Reflector 1 (A, C, P) | ||||||
| Location: | CentralArea 1/2/3, Class6-1Comp, Class1-1Comp, ToiletComp | ||||||
| HP: | Element: | Damage: | |||||
| Dropped: | Reflector 2 (B, G, Y) | ||||||
| Location: | ToiletComp (only the ToolPgrm battle) | ||||||
| HP: | Element: | Damage: | |||||
| Dropped: | Reflector 3 (E, F, O) | ||||||
| Location: | |||||||
| HP: | Element: | Damage: | |||||
| Dropped: | None | ||||||
| Location: | |||||||
| HP: | Element: | Damage: | |||||
| Dropped: | Reflector 1 (*), Reflector 2 (*) | ||||||
| Location: | |||||||
| HP: | Element: | Damage: | |||||
| Dropped: | Reflector 3 (*) | ||||||
| Location: | |||||||
Rockman.EXE Phantom of Network
(メットール1) |
HP: | Element: | Damage: | ||||
|---|---|---|---|---|---|---|---|
| Dropped: | ShockWave (D,J,R), MetGuard (*) | ||||||
| Location: | Akihara Area 1-3, Kanchou Area 1-2, Meiru no PC no Dennou 1-3, Suidou Kanri Server no Dennou 1, Battle Machine no Dennou 1-3, Netto no PC no Dennou, Televi no Dennou, Reizouko no Dennou, Nuigurumi no Dennou, Kokuban no Dennou, Tsukue no Dennou, Sensei no PC no Dennou, Inugoya no Dennou, Kenbaiki no Dennou, Jidou Door no Dennou, Monument no Dennou, Papa no PC no Dennou, Touroku Machine no Dennou, Kanyoushokubutsu no Dennou | ||||||
(メットール2) |
HP: | Element: | Damage: | ||||
| Dropped: | SonicWave (G,M,W), MetGuard (*) | ||||||
| Location: | Kanchou Area 1-2, Densan Area 1-3, Ura Internet 1, Suidou Kanri Server no Dennou 1-3, Battle Machine no Dennou 1-3, Tent no Dennou 1-2, Butai Souchi no Dennou 1-3, IPC Server no Dennou 1-4, Kenbaiki no Dennou, Jidou Door no Dennou, Papa no PC no Dennou, Kanban no Dennou, Shingouki no Dennou, Kanyoushokubutsu no Dennou, Zaseki no Dennou, Shingata PET no Dennou, Kanri System no Dennou, Antenna no Dennou | ||||||
(メットール3) |
HP: | Element: | Damage: | ||||
| Dropped: | DynaWave (E,Q,T), MetGuard (*) | ||||||
| Location: | Ura Internet 3-4, Mobile Area no Dennou 1-4, Dennou Sekai no Ana no Dennou 1-4, Security Server no Dennou 1-2, Cache Server no Dennou 1-4 | ||||||
(メットールSP) |
HP: | Element: | Damage: | ||||
| Dropped: | DynaWave (E,Q,T), MetGuard (*) | ||||||
| Location: | Cache Server no Dennou 5, Ura Internet 2,5, Secret Area 1 | ||||||
Rockman.EXE WS
| This section requires expansion. |
Battle Chips
The Mettaur family has basically two types of Battle Chips, one for attack and other for counterattack.

The Battle Chips Shock Wave/Shockwave (ショックウェーブ Shokku Wēbu), Sonic Wave (ソニックウェーブ Sonikku Wēbu), Dyna Wave (ダイナウェーブ Daina Wēbu), are a non-elemental attack where the user swings a pick to send a shockwave forward. The shockwave can pierce some defenses, but as it moves in the ground, hole panels will stop them.
Big Wave, known as Great Wave (グレートウェーブ Gurēto Wēbu) in Japan, is a stronger version that cracks the panels it passes by. It only appears in Mega Man Battle Network 3, being obtained from Mettaur3 if MegaMan has Custom Style.
Met Guard (メットガード Metto Gādo), also known as Guard, is a Battle Chip that repels an enemy's attack as a shockwave attack, unless attacked by the enemy's body. For example, Guard cannot block Fishy's and Powie's attacks, as they directly hit the player rather than firing a projectile. In the first game there is a Battle Chip named Buster Guard (バスターガード Basutā Gādo) that allows the user to use Met Guard several times for 1 turn. In Mega Man Network Transmission, it has two variations from different enemies, the Shield Guard (シールドガード Shīrudo Gādo) dropped by Shield Attacker and High Guard (ハイガード Basutā Gādo) dropped by Sniper Joe.
Met Guard chips are replaced by the Reflector (roughly "ReflecMet" (リフレクメット Rifureku Metto) in Japan) family in the sixth game. It acts the same way, but instead of shockwaves, it releases a fast chain of explosions that aren't stopped by holes.
Mega Man Battle Network
| ID | Image | Battle Chip | Description | Attack | Code | Rarity | |
|---|---|---|---|---|---|---|---|
| 023 | 
|
ShokWave (ショックウェーブ) |
Piercing ground wave |
C,K,L,N,P | ⋆•••• | ||
| 024 | 
|
SoniWave (ソニックウェーブ) |
Piercing ground wave |
C,D,J,M,S | ⋆⋆••• | ||
| 025 | 
|
DynaWave (ダイナウェーブ) |
Piercing ground wave |
C,E,M,R,S | ⋆⋆⋆•• | ||
| 067 | 
|
MetGuard (メットガード) |
Hold A Btn for 3 sec defense! |
A,C,E,G,L | ⋆•••• | ||
| 107 | 
|
BstrGard (バスターガード) |
1-turn of MetGuard w/ B Btn. |
A | ⋆⋆⋆•• | ||
Mega Man Battle Network 2
| ID | Image | Battle Chip | Description | Attack | Code | MB | Rarity | |
|---|---|---|---|---|---|---|---|---|
| 040 | 
|
Shockwav (ショックウェーブ) |
Shock goes through enemies |
H,J,L,R,U | 10 | ⋆•••• | ||
| 041 | 
|
Sonicwav (ソニックウェーブ) |
Shock goes through enemies |
E,I,M,S,W | 30 | ⋆⋆••• | ||
| 042 | 
|
Dynawave (ダイナウェーブ) |
Shock goes through enemies |
G,N,Q,T,V | 50 | ⋆⋆⋆•• | ||
| 114 | 
|
Guard (メットガード MetGuard) |
Repel the enemy's attack |
* | 2 | ⋆•••• | ||
Mega Man Battle Network 3
| ID | Image | Battle Chip | Description | Attack | Code | MB | Rarity | |
|---|---|---|---|---|---|---|---|---|
| Standard 044 |

|
ShockWav (ショックウェーブ) |
Shock through enemies |
D,H,J,L,R | 10 | ⋆•••• | ||
| Standard 045 |

|
SonicWav (ソニックウェーブ) |
Shock through enemies |
G,I,M,S,W | 26 | ⋆⋆••• | ||
| Standard 046 |

|
DynaWave (ダイナウェーブ) |
Shock through enemies |
E,N,Q,T,V | 42 | ⋆⋆⋆•• | ||
| Standard 047 |

|
BigWave (グレートウェーブ GreatWave) |
Shck wave cracks panels |
E,J,M,P,Y | 82 | ⋆⋆⋆⋆• | ||
| Standard 133 |

|
Guard (メットガード MetGuard) |
Repels enemy's attack |
* | 5 | ⋆•••• | ||
| Standard 174 |

|
Mettaur (メットール Metall) |
Summons a Mettaur to fight! |
E,L,M,O,T | 30 | ⋆⋆⋆⋆⋆ | ||
Mega Man Battle Network 4
| ID | Image | Battle Chip | Description | Attack | Code | MB | Rarity | |
|---|---|---|---|---|---|---|---|---|
| Standard 103 |
Guard1 (メットガード1 MetGuard1) |
Repels enemy's attack |
A,L,V,* | 4 | ⋆•••• | |||
| Standard 104 |
Guard2 (メットガード2 MetGuard2) |
Repels enemy's attack |
C,G,P,* | 10 | ⋆⋆••• | |||
| Standard 105 |
Guard3 (メットガード3 MetGuard3) |
Repels enemy's attack |
F,R,T,* | 16 | ⋆⋆⋆•• | |||
Rockman EXE4.5 Real Operation
| ID | Image | Battle Chip | Description | Translation | Attack | MB | Rarity | |
|---|---|---|---|---|---|---|---|---|
| Standard 103 |
Met Guard 1 (メットガード1) |
タイミングガードし 攻撃をしょうげきは にしてはねかえす! |
By timing guard, repel an attack with a shock wave! | 4 | ⋆•••• | |||
| Standard 104 |
Met Guard 2 (メットガード2) |
タイミングガードし 攻撃をしょうげきは にしてはねかえす! |
By timing guard, repel an attack with a shock wave! | 10 | ⋆⋆••• | |||
| Standard 105 |
Met Guard 3 (メットガード3) |
タイミングガードし 攻撃をしょうげきは にしてはねかえす! |
By timing guard, repel an attack with a shock wave! | 16 | ⋆⋆⋆•• | |||
Mega Man Battle Network 5
| ID | Image | Battle Chip | Description | Attack | Code | MB | Rarity | |
|---|---|---|---|---|---|---|---|---|
| Standard 131 |
Guard1 (メットガード1 MetGuard1) |
Repels a enemy's attack |
A,D,K,* | 4 | ⋆•••• | |||
| Standard 132 |
Guard2 (メットガード2 MetGuard2) |
Repels a enemy's attack |
B,L,Q,* | 10 | ⋆⋆••• | |||
| Standard 133 |
Guard3 (メットガード3 MetGuard3) |
Repels a enemy's attack |
C,M,S,* | 16 | ⋆⋆⋆•• | |||
Mega Man Battle Network 6
| ID | Image | Battle Chip | Description | Attack | Code | MB | Rarity | |
|---|---|---|---|---|---|---|---|---|
| Standard 091 |
Rflectr1 (リフレクメット1 ReflecMet3) |
Bounce an attck back at them! |
A,C,P,* | 7 | ⋆•••• | |||
| Standard 092 |
Rflectr2 (リフレクメット2 ReflecMet3) |
Bounce an attck back at them! |
B,G,Y,* | 16 | ⋆⋆••• | |||
| Standard 093 |
Rflectr3 (リフレクメット3 ReflecMet3) |
Bounce an attck back at them! |
E,F,O,* | 25 | ⋆⋆⋆•• | |||
Mega Man Network Transmission
| ID | Battle Chip | Description | Attack | Element | Size | Rarity | |
|---|---|---|---|---|---|---|---|
| 041 | |
ShockWav | Smashes blocks with pickax for a shockwav attack! | 40 | 8 MB | * | |
| 042 |  |
SonicWav | Smashes blocks with pickax for a shockwav attack! | 70 | |||
| 043 |  |
DynaWav | Smashes blocks with pickax for a shockwav attack! | 100 | |||
| 090 | |
Guard | Can be used to convert attacks into shockwaves | - | 16 MB | * | |
| 091 | 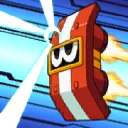 |
ShldGard | |||||
| 092 |  |
HiGuard | |||||
Mega Man Battle Chip Challenge
| ID | Battle Chip | HP | AP | MB | Element | Acc | Dodge | Priority | Attack | Description | Rarity | |
|---|---|---|---|---|---|---|---|---|---|---|---|---|
| 040 | |
Shockwav | 120 | 50 | 10 | B | ? | ? | Pierce50 | Pierce Guard Navichip Attack | * | |
| 041 | |
Sonicwav | 120 | 70 | 20 | B | ? | ? | Pierce70 | Pierce Guard Navichip Attack | ** | |
| 042 | |
Dynawave | 120 | 130 | 40 | B | ? | ? | Pierce130 | Pierce Guard Navichip Attack | *** | |
| 114 | |
Guard | 10 | 40 | 20 | B | ? | ? | Reflec40 | Reflect Non-Elem Attack | ** | |
Rockman.EXE WS
| This section requires expansion. |
Advanced PET
| ID | Japanese name | English name |
|---|---|---|
| 088 | Met Guard 1 | Guard1 |
| 089 | Met Guard 2 | |
| 090 | Met Guard 3 |
Other media
MegaMan NT Warrior
Mettaurs are a recurring virus in the anime series. A giant Mettaur appeared in the first episode of Rockman.EXE Stream and the 14th episode of Rockman.EXE Beast+. In Beyondard, Beast Mettaurs are part of Gregar's army.
MegaMan NT Warrior (manga)
A Mettaur with an arrow on his helmet leaves the Undernet to ask for help, and when GateMan.EXE takes him back, he accidentally takes MegaMan with him. MegaMan discovers that Mettaurs are under attack and helps them.
Gallery
")
")
")
")
")
")
")
")
")
")
")
")
")
")
")
")
")
")
")
See also
| Mega Man Battle Network | |
|---|---|
| Main characters | |
| Lan • Mayl • Chaud • Dex • Yai • Dr. Hikari • Wily • MegaMan • Roll • ProtoMan • GutsMan • Glyde • Bass | |
| Bosses | |
| FireMan.EXE • NumberMan.EXE • GutsMan.EXE • StoneMan.EXE • IceMan.EXE • ColorMan.EXE • ElecMan.EXE ProtoMan.EXE • BombMan.EXE • MagicMan.EXE • Life Virus -Optional bosses- WoodMan.EXE • SkullMan.EXE • SharkMan.EXE • ShadowMan.EXE • PharaohMan.EXE • Bass.EXE | |
| Enemies | |
| Ammonicule • Anaconda • Beetank • Billy • CanDevil • Canodumb • Cloudy • ColdBear • Fanner • Fishy • Flappy Froshell • Gaia • Handy • HardHead • Jelly • Megalian • Mettaur • Miney • Mosqurito • Piranha • Poitton Popper • Prog • Puffy • Ratty • Rush • Satella • Spooky • Swordy • Twisty • VolGear | |
| Miscellaneous | |
| List of Battle Chips • List of Upgrades • Walkthrough • Script | |