| This article is a stub from the Mega Man series. You can help by expanding it, adding pictures, and improving existing text. |
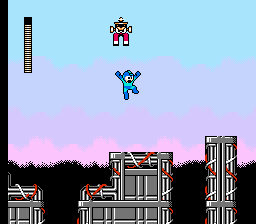
Walkthrough for Mega Man 3.
"Calling Mega Man! Calling Mega Man! Come in please!
"Mega Man, we need you! We're down to the wire on our peace-keeping project. We've got to get those last Energy Elements or we can't finish it. Dr. Wily is here now, too...yes...he's finally found his sanity. He knows where the Elements are! They're in the mining worlds, but we can't get to them. The robots are running amok and they're destroying everything!
"You've got to get there, Mega Man, and get those Elements! You'll have to face some pretty mean metal. Expect the worst! Is Rush there with you? Give him a bolt to chew on and tell him it's from us. What's that...we must be getting static...sounds like you said 'Woof!'
"Mega Man, get to those mining worlds pronto! Grab the Elements and stop whoever's in charge! He's one lunatic guy!
"This is Dr. Light. Over and out!"
You heard Dr. Light, Mega Man! It is your job to retrieve the Energy Elements from those rogue Robot Masters. This may seem like a daunting task to you, but don't worry. A new state-of-the-art strategy guide has been installed here on MMKB. Utilize this tool on your quest and you will find your mission much easier. Now set out, Mega Man! Everyone is counting on you!
Level Strategies: Robot Masters[]
Utilizing your Variable Weapons System to its maximum potential is key to completing your mission successfully. The boss order provided here is designed to help you in that regard. However, if you feel another boss order is more efficient than this one, by all means use yours. The following level strategies were designed to conform to any boss order imaginable.

- Top Man: he gets double damage from the Mega Buster and is weak against Hard Knuckle;
- Shadow Man: he's weak against Top Spin; he drops the Rush Marine, very useful in Gemini Man's and Snake Man's stages;
- Spark Man: he's weak against Shadow Blade;
- Magnet Man: he's weak against both Spark Shock and Shadow Blade AND he also gets double damage from the Mega Buster;
- Hard Man: he's weak against Magnet Missile;
- Gemini Man: he's weak against Search Snake (Use Shadow Blade if you have not unlocked it);
- Needle Man: he's weak against Gemini Laser and drops the Rush Jet, very useful in Needle Man's stage when revisited.
- Snake Man: his weapon is very useful in Top Man's and Shadow Man's stages, as well as in Wily Stage 1; he's weak against Needle Cannon;
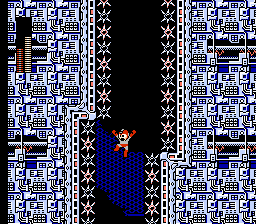
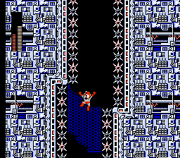
Top Man's Stage[]
When you arrive, run to the right as you usually do. After going ahead a bit, you'll be greeted by the invulnerable yet harmless enemies Bolton and Nutton, both of which turn into a vulnerable yet harmful enemy when attached to each other. A few more of these, and a few Mechakkeros are the only enemies left in this room. If the Mechakkeros or Bolton-Nuttons damaged you a bit, grab the energy capsule on the ledge at the end of the room. A small one screen room ahead consists of nothing more than a set of stairs with a Komasaburo (Top Fiend) at the top. Just jump over the enemy's projectiles while jumping on the stairs, and when you reach the same level that he is on, just shoot at him. You will damage him while simultaneously destroying the tops he shoots, so you don't need to worry about being damaged. The next area has a few small energy capsules and a large weapons energy capsule, but you probably won't need either of them. Bolton and Nutton attempt to push you into the lethal thorns in the next room, but luckily their placement is not too troublesome, as usual. In the next room, a couple of Pickelmen Bulls try to mow you down. Despite their girth, just a few shots to the enemy's head will dispatch it. A few goodies await you on the upper ledge, so I recommend taking that route. After you bypass a small room with a few Metalls in it, you will arrive in the lair of this stage's first mini-boss, the giant robotic cat Tama.
In this first battle, all Tama will do is shoot a robotic ball of yarn towards you. Slide or jump over the bouncing ball when it gets close. Shoot at Tama when possible and he will go down shortly. Just one badly-placed top fiend stands between you and the next Tama, in another dark chamber. This one Tama is easier than the last. Since there is no wall at the left side of the screen, the yarn balls that the cat shoots can bounce away, meaning easier maneuvering and less slowdown. However, this Tama releases robotic fleas from its "fur." (steel wool?)
The first room after the Tama only contains a Met and some spikes; the next room is tricky. A top fiend awaits at the end of a twisting path, shooting tops down at you. If you have the Magnet Missile handy, by all means blast away; if you only have your trusty mega buster or another useless weapon with you, try your best to maneuver the passage without getting toppled! The next and final part of the stage just contains a few top-shaped platforms that move vertically. Mega Man will move slowly from left to right on these, so watch the timing.
- Boss


Top Man has a very predictable pattern. He will first fire 3 tops into the air, all of which fly at where you are or where you were when he fired, which is shortly after he releases them into the air. To dodge this, stand at the opposite side of the room from Top Man, and when they are about to hit you, jump forwards. After this Top Man uses Top Spin to move to the other side of the room to repeat the attack pattern.
Mission complete: The hydroponic asteroid's solar generators have been secured and Top Man is spun out. Energy Element retrieved.
Shadow Man's Stage[]

From the starting platform, fall down one of the pits to the left or right and avoid the New Shotman in the next room. Drop down another pit and kill the Mechakkeros and the Pickelman Bull awaiting you. Once the enemies are dispatched, drop down yet another pit to the far right. You'll land in an enclosed room and your loving brother Proto Man will appear and fight you. He isn't hard to defeat at all. He just runs from one side of the room to the other and fires two shots each time he jumps. The best way to defeat him is to shoot randomly in Proto Man's general direction, and, when he gets close, to slide under him when he jumps. As a reward for beating him, Proto Man will open up the route to the rest of the sewers.
This next area is just filled with basic enemies. However, just a little bit ahead you will find a Hologran hanging from the ceiling. These are not too troublesome, because you can scroll them off screen by walking to the right and no deadly pits are within range of their projectors (not in this stage, at least!). After passing through that not-so-troublesome room, you will fall into a corridor with a few Mechakkeros in it (Top Spin is the most effective weapon towards these), and after this area to will find yourself in an room with a lot of pits. Parasyus will drop from the ceiling, but top spin or shooting at the enemies from far away works well. Clearing this short area will lead you to the boss chamber.
- Boss
-

Shadow Man's attack pattern is quite simple. He will first jump three times towards you (these jumps can be either large or small) and after that he will shoot two Shadow Blades at you or slide rapidly towards you. It is not hard to shoot him while he jumps, but the trouble is anticipating his attacks. Each one (that is, releasing shadow blades or sliding) must be handled with differently, and if you accidentally handle a slide the way you would handle a shooting, or vice versa, you are in trouble. My best advice is to hit him over and over with the top spin, his mortal weakness. (Perfect runners, I don't know what to tell you...)
Mission complete: The volcanic asteroid outpost has been cleared of enemy forces and Shadow Man is defeated. Energy Element retrieved.
Spark Man's Stage[]


You will start off in a room with a ladder leading to an upper ledge. Climb up the ladder and blast away the Peterchy on the upper ledge, or wait for it to fall down and then kill it. The next area features a few strange ducts on the ceiling. Elec'ns eventually fly out of these. 8 sparks will radiate outward from their bodies when they are situated directly over you, so make sure to kill them first. The next one-screen area features nothing more than a lone Hammer Joe, so you shouldn't have much trouble. The next room, though, is more challenging. When you first arrive, you will notice two things: a few small platforms with arrows pointing up on their sides, and spikes on the ceiling. As the arrows indicate, the platforms move up when you step on them. Your best bet is to just run off the platform you have landed on just at the right moment, so you fall onto the adjacent platform. After you pass these platforms, just avoid a few Electric Gabyoalls and continue. The next room has a few power-ups on a ledge and a Pickelman Bull. Shoot the enemy in the head to kill it and harvest the powerups if you need them. The next room has nothing more than a few Peterchys to avoid. A long shaft follows (don't worry, no spikes line the walls) which leads to a trash-compacting room. Compacted cubes of scrap metal fall from the ceiling, and unless you rush through this area as fast as possible the cubes themselves will reach the ceiling, blocking the route. The final area is another rising-platform segment, with an added twist: Nutbolt enemies lie in your path. But never fear: remember, these are one-hit enemies, and there are evenly-spaced non-rising platforms along the way. After surviving this last segment, make your way to the lair of Spark Man.
- Boss
-

Spark Man jumps 3-4 times, then shoots eight sparks in all directions. After that, he unleashes his premium attack, the Spark Shock, a large and damaging version of the smaller spark. He repeats that. Shoot him whenever you have a chance.
Mission Complete: With Spark Man unplugged, the generator is freed and the power grid is up and running again. Energy Element retrieved.
Magnet Man's Stage[]

Once you arrive in Magnet Man's stage, you will be greeted by a few Mag Flies. Once above you, these enemies will levitate you a few "feet" into the air. Those who are near the top of the screen will not harm you, and those who are low enough to damage you are in the range of your Mega Buster. Once you clear this small area, you will arrive in the typical arena where Proto Man will face off with you once again. (His strategy is the same as before, so see Shadow Man's walkthrough for information on how to beat him.) When defeated, he will unlock the path to the interior of the electromagnet.
After clearing a small room containing a few Giant Springers, you will be introduced to the electromagnets which will haunt you for the rest of the stage. (Fun fact: the initials on the batteries next to the electromagnets incorrectly stand for "Right and Wily" instead of "Light and Wily." Dr. Right is Dr. Light's Japanese name.) When on the same horizontal plane as these magnets, they will suck you towards them. The Peterchys in this room pose no threat, but the appearing blocks not far ahead will. You can acquire a few energy capsules in the next room if you fall on the ledge to the left, but you won't need them. The next room looks relatively safe; you are greeted by a small area with Appearing Blocks. Follow a pattern of four diagonal blocks from the bottom-left of the room to the ledge on the top right. The next area is a little bit more annoying, as an electromagnet is thrown into the mix. Here, jump on the first block that appears, then run immediately to the left, to avoid being sucked off by the electromagnet. Wait a second, then jump to the right exactly when the block disappears to jump on another block. from there jump a tad to the right to land on the last block you need in this section. Do not jump down to the ledge in the next small appearing block section. Instead, stand on the platform you are on until a block appears in the air in front of you. Jump on it, then jump on a block that appears next to the right ledge a second later. The final appearing block pattern is simple, as long as you ignore the block that appears at the bottom of the screen. Pass right by the next room climbing up the ladder from the appearing blocks, and climb to the room with the New Shotman in it. Climb down the ladder to the bottom right if you want the powerups in the room you just passed, otherwise continue to the ladder on the upper right. continue up the ladder to the final room, which contains another pesky Giant Springer. After you defeat it, go through the boss door to the right.
- Boss
-

Magnet Man has, like most bosses, two attacks: jumping and firing 3 Magnet Missiles, then falling to the ground; and using his magnetic body to pull Mega Man towards him, during which Magnet Man is invincible. He will do these attacks in a random order. The best way to defeat him is to shoot him when he first jumps towards you and then slide immediately afterwards, to avoid his falling on top of you. Repeat this, as always.
Mission Complete: The giant electromagnet has been turned off and out of Magnet Man's pull. Energy Element retrieved.
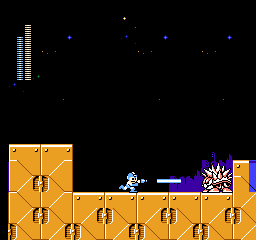
Hard Man's Stage[]

Once you arrive in the industrial mines of Hard Man's stage, you will immediately be spotted by the oddly-named enemy Have "Su" Bee. As soon as you see this enemy, run to the left to scroll them off-screen. Allowing them to drop the hives that they carry release a torrent of miniature robotic bees that follow you until you manage to kill them. (No, not even top spin works on them!) Once you pass this short area, you will arrive at the entrance to the mines, guarded by Wanaans, bear-trap like enemies that arise from their holes about a half-second after you pass over them. The next room contains an over-intimidating Hammer Joe that can either be obliterated with the Magnet Missile or the Shadow Blade from the ground and the Mega Buster on his ledge if your timing is good. However, it is highly recommended that you do not use the Magnet Missile, as it saps up a good few pixels of energy with each shot. As this weapon is Hard Man's weakness, saving up as many Magnet Missiles as you can is essential. The next area presents a large temptation to use the Magnet Missile as well, with there being Returning Monking hanging from the ceiling. When you scroll these enemies only a little bit onscreen, they will immediately jump from the ceiling and leap spastically towards you, moving faster than mega man even when he is sliding. It takes no less than 4 magnet missiles to take out the robotic primates, so slide through this room as fast as possible. Climb the ladder you just encountered past a useless room featuring a lone Hammer Joe to another small room with yet another Returning Monking. This one will jump down without a moment's notice, but it's extremely high jump will allow passage to the end of the room. The next area, a large one, presents two branching paths. After obliterating a couple of Pickelman Bull, take the upper path, despite the enemy, as it yields an Energy Tank. Passing by a small room containing a couple of Metalls will lead you once again to the open air and the Wanaans, both of which pose no threat to those with some amount of skill. However, clearing this area leads you to a sub-boss: it's Proto Man, of course. the uneven ground actually requires you to jump, but the battle is easy as usual. After defeating the yellow-caped cretin, continue past the final room (containing the familiar Bikky) to the boss arena.
- Boss
-

Hard Man follows a monotonous yet effective pattern: Shooting two Hard Knuckles at you, and then attempting to jump on top of you. (note: when Hard man falls to the ground after he jumps, time will temporarily freeze.) To avoid his hard knuckles, stand as far away as you can from the boss. All the while, fire your Magnet missiles like there's no tomorrow, except when Hard man is jumping, during which he is invincible.
Mission Complete: The underground mine is now operational and freed of Hard Man's iron fist. Energy Element retrieved.
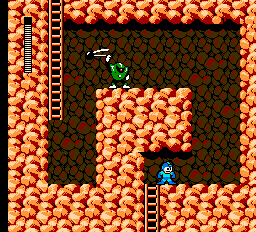
Gemini Man's Stage[]

You will first arrive on the surface of the comet you will be exploring. Although the ground looks like it is icy here, normal Mega Man ice physics are gone, and ironically the skies above the comet are populated with fire-dropping Nitrons. These enemies will dive down and then shoot up into the sky while dropping three Flame Man-esque fire pillars. If one not within the range of your Mega buster, by the time it begins to dive, try to stand in the spot where you think the pillars will not land. The surface of the comet is populated with a few Bomber Pepes, penguin-like enemies that shoot explosive eggs every once in a while and seldom move. The eggs bounce in irregular arcs, so shoot them as soon as you see them. After traversing the comet's surface for a while, you will come across a giant airlock, presumably installed by Wily's forces, that blocks access to the inside of the comet. Never fear, however, as Proto Man decides to help (for once!) by destroying the airlock. Drop down the subsequently-created hole to the left if you want a life or to the right if you want an energy pickup.
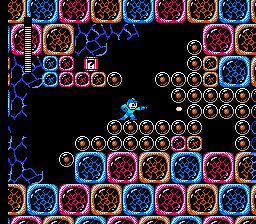
The second section of the stage is populated by a substantial number of strange eggs, which can only be opened with a shot from the Mega Buster. Once opened, these small eggs will bear alien larvae, named Poles, which can "swim" through the air with their flagellum-like appendages. Both the egg and the larva can be destroyed with one hit, and the unopened eggs act as platforms as well as walls. You will need to strategically shoot certain eggs to clear a passage to the heart of the comet.
The first egg section is easy; simply shoot every egg you see to clear a path and slide when you need to. The second one, located in the next room, is also simple. Jump to the second-topmost ledge and shoot through about two eggs to the ladder at the left. Climb up the ladder to reach the final egg section. The final segment may seem intimidating, but it is just as easy as the others. Use the Rush Coil ability to leap up to the uppermost ledge of the formation, and simply shoot your way to the exit. Making your way through the final barricade leads you to a large room occupied by a Penpen Maker. Shoot it about 10 times in the head to destroy it (it has a relatively large hitbox) and continue on to the next Penpen Maker, just as easy to beat as the first.
Before entering the third area, you will be presented with a small one-screen room containing a large energy pickup on an upper ledge. Use rush coil to retrieve it if you need it.
The final area of the stage, a water section, offers us an opportunity to use the Rush Marine, but whatever you do, do not use it (the combo of Gyoraibos and Yambows is deadly with limited mobility), unless you think intentional death is somehow funny. Instead, use the conveniently placed, yet precarious platforms placed at regular intervals. Several enemies, including Yambows from above and Gyoraibos from below, try to intervene on your ever-important mission, but whatever you do, keep moving. The enemies, especially the Gyoraibos, absolutely love it when you stop. However, when you reach the small hole that is only passable by sliding, wait for the Yambow that appears above you to fly down to your level before sliding to the block below. Snag the E-tank at the end of the passage and continue on to the final two rooms. The second to last room contains a couple of Mechakkeros, which can easily be eliminated using the top Spin ability. The final room contains a horribly-placed Bikky (to your advantage, of course). after eliminating the large enemy, continue on the boss arena.
- Boss
-

Gemini Man will at the start of the battle, split into 2 and start jumping across the room. During this time, when you use an attack that is not Top Spin, time stops for a short moment and he fires a pellet shot at you. If you do not have Top Spin, to evade the pellet shots, fire at him when he gets close to or touches the ground. Because he is facing the other way, the pellet shot will miss you. When his health is half of his max health, he starts his 2nd attack phase. Gemini Man will run back and forth from the room and jump when you fire a shot, and occasionally firing the Gemini Laser. Use hard knuckle to finish him off during this phase.
Mission Complete: Gemini Man's constant presence is gone and scientific work on the asteroid has resumed. Energy Element retrieved.
Needle Man's Stage[]

The first things you will have to pass are a few Hari Harries. They shoot their needles at you and then roll towards you. Jump over them when they roll if you can't kill them in time (beware their notoriously large hit boxes), make your way past them, and climb down the nearby ladder. You'll encounter two paths; the lower one is a dead end but has a large weapon capsule guarded by a Metall, and the upper one is the main path. Taking the top path to continue, shoot the Cannons when they open. Next will be a series of annoyingly-placed Mets aided by Yambows, just for good measure. Pass them and continue. After you climb down the ladder, you will arrive inside one of Needle City's many factories. Needle Presses periodically shoot from the ceiling here. Remembering that you will not stop sliding if you are in a sufficiently narrow corridor, set forth. once you reach the final needle press, try leaping onto the narrow platform it is on just as it is retracting. Once you exit the factory, you will encounter another Needle Harry. This one is harder to avoid due to the uneven ground. Jump over him and, if you want to, use the Rush Coil to reach the energy tank. Climb up and defeat the Hammer Joes in the next area (no, you can't shoot them on the ladder). Climb again to find yourself in a room with a lone Bikky. Slide under the behemoth when it jumps. Distance is key here as well as timing. to ensure a satisfactory outcome, get as close as you can to the Bikky and slide immediately as it jumps. With the stage cleared, continue on to the boss.
- Boss
-

Needle Man has two attacks. One is the Needle Cannon attack, when he jumps high into the air and shoot four needles at you, and the other is the Needle Crown attack, during which he bends forward and shoots his "crown" at you. Jump carefully in between the thrown needles, but be more cautious of the head spikes as they do a high amount of damage. Slide under him when he jumps to avoid this attack. Don't worry about your aim if you're using the Gemini Laser; unless you already know, the laser bounces every which way and will probably hit him, due to his erratic jumping. You obtain the Needle Cannon and Rush Jet for defeating him.
Mission Complete: The shipyard is operating once again and Needle Man has been pinned. Energy Element retrieved.
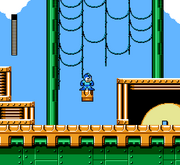
Snake Man's Stage[]


The first enemies encountered here are Dada (a bouncing enemy) and Petit Snakey (the snake head attached to the platforms). The Petit Snakey cannot move but shoots pellets at you. Kill both that and the Dada and move on, passing more of each enemy, then go up the ladder. In the next room you will see three Petit Snakeys. These particular ones are hard to dodge due to of uneven ground. Take them out and climb up to face Big Snakey, a giant snake head. Dodge his shots by standing at the left and jumping forward over them. Do not step onto the waving platform or you will have a hard time aiming.
Once you kill him, move into the next room where more Petit Snakeys await, as well as a Potton, an enemy that dive-bombs you. These snakes can push you into the cliff if you jump when they shoot, so be careful. Pass them, pick up the 2 large energy capsules if you need to, and go down the ladder. Next is a large room with more Pottons, as well as Bubukans (pole-vaulting enemies). Try to get the Bubukans to jump over you, then turn around and shoot them before they come running back at you. After this room, go up and defeat the Hammer Joe, and go up again. The right ladder leads to 2 mystery capsules, which contain a random item. When you climb up the left ladder, be aware that another Big Snakey awaits at the top. In the next room Bubukans will attack you, so kill them as before. The pit you must jump looks wide, but it is narrow enough to jump across without assistance. Get the large energy capsule if you need it and climb the right ladder. Kill the Jamacy on the ladder and climb up again to reach the top of the tower.
The next part is a tricky jumping bit, but if you have Rush Jet you can use it now to bypass it entirely. The wide platforms with grilles release Cloud Chariots that zigzag upwards, you will need to use these to cross. Bomb Fliers will zigzag toward you, shooting them reveals a bullet that flies straight. After the cloud platforms you will need to jump across some small, non-moving platforms. Dodge the Bomb Fliers here and you will be at the boss room.
- Boss
-

Snake Man jumps around a lot, and shoots little snakes at the highest point of his jump. These snakes crawl across the floor and walls, so jump over them. the trickiest part of this battle is the uneven floors, which can make things a pain. Fortunately, you can shoot through the central platform. Snake Man is weak to Needle Cannon, and he gives you Search Snake upon defeating him.
Mission Complete: The abandoned mining asteroid has been freed from Snake Man's coils. Energy Element retrieved.
Level Strategies: Doc Robots and Break Man[]
After defeating the eight bosses, it is revealed that mysterious robots have appeared in four of the stages you have previously cleared. Each of the mysterious robots are called "Doc Robot K-176". This may be a distraction, but it is clear that these robots must be stopped to avoid further destruction.
Spark Man's Stage (Revisited)[]
You will once again arrive in section B1 of the power plant, this time with the usual ladder destroyed. A Peterchy resides on the upper ledge. Wait for it to come down, then use the Rush Coil to continue. Use Shadow Blade or Gemini Laser to kill the Ant on the ladder in the next room, and continue into the next area. The next area will contain a few platforms that seem to spin around, but they present little danger unless you stand on them for more than five seconds. Pass two rooms, one with spinning platforms over a pit of spikes and the next with a few Giant Springheads, to get to the first boss of the stage, the Metal Man Doc Robot. He can't really put up a fight without his conveyor belt, so just use the Magnet Missile or Hard Knuckle to take care of him.
After defeating the boss, continue down a long spike-lined shaft. The wide clearance on each side prevents any potential deaths. When you reach the bottom, you will find yourself in a corridor filled with Boltons, Nuttons, and Electrical Spines. You can simply scroll the spines offscreen by making them disappear off the far right of the screen, and Bolton and Nutton can be defeated with top spin once they fully attach. the next area, which is also a corridor, is filled with Junk Block dispensers. Your best bet is to run through the area, The second boss is Quick Man, on whom you will want to use the Gemini Laser or Search Snake. Get close, because you are not able to access your items (and essential E-tanks) while the laser is ricocheting around the room.
Shadow Man's Stage (Revisited)[]
Upon your arrival in this stage, you will encounter yourself on a platform with spikes running down each edge. jump down any one of the two sides without fear, as there is no enemy or spike pit at the bottom. Two more rooms of similar traps and obstacles follow. However, shifting from the third room to the fourth while in freefall, prepare to veer to the right to avoid a pit of spikes below.
The fourth room features a scattering of Peterchies that may be quickly dispatched. Beware the Bikky in the next room, though, and remember that it is much safer and quicker to simply slide under it while it jumps and escape than to actually kill it.
More pesky Peterchies await you in the next room, but as soon as you destroy them, watch out for the sight-obstructing Holograns and the explosive and determined Walking Bombs. The Walking Bombs can be destroyed with one hit, but they explode when killed, meaning that being in the proximity of the enemy when it dies causes damage. Walking Bombs will never stop running either, so be quick about killing them. Right as these two enemies/ obstacles appear, you will notice a series of red platforms. These drop away as soon as you step on them, so attempt to execute a series of quick jumps done in rapid succession to cross the platforms. Luckily, no pit lie below the platforms.
Not far ahead is another Hologran, as well as another set of red platforms. A pit does sit below the red platforms here, and the placing of the platforms is much more complex than before. I recommend that you use Rush Jet. The next room has a few small weapons energy capsules, so use them on whatever you need to and continue on to the next Doc Robot: Wood Man. Use Needle Cannon or Search Snake and be careful to avoid his attacks!
After defeating this boss, walk through the door to the right to discover a hallway. This contains a few Hammer Joes. Considering the height of the hallway, jumping over their hammers is not an option, so remember to slide under the hammers instead.
The next room, located in the very depths of the sewers, is riddled with pits and holes. The various Parasyus and Mechakkeros will try to knock you into them, but as long as you get these enemies onscreen before you reach the platform they are on, you can easily kill them. The last room before the next Doc Robot contains a single Giant Springhead. The Doc Robot fought here is Heat Man. Use the Top Spin if you're feeling risky, or just use the Shadow Blade and keep your distance.
Gemini Man's Stage (Revisited)[]
Your next visit to the mysterious star starts mostly the same as before, with a few Nitrons here and there, though some Jamacys are thrown into the mix. You will soon arrive at a large crater which leads to the inside of the comet. Gone is the airlock of the main crater; it is now possible to enter the asteroid completely unobstructed.
Once you enter, however, you are greeted with an onslaught of Pottons. These, as you must know, can be easily destroyed. On the far left wall, you will notice a ? Tank; If it wields something valuable, use Rush Coil or Rush Jet to retrieve it. Ahead is the usual wall of Pole Eggs, always easy to penetrate. After a few sessions of Pole cleaning, you will advance to the first Doc Robot of the stage, Flash Man. The uneven terrain and large hitbox of the Doc Robot can make for a hassle of a fight, but Needle Cannon or Gemini Laser should do the trick.
Next, you will go for a dip in the questionable water, finally giving a reason to use Rush Marine. Blast the Gyoraibos in your way and slide under the exit, dodging a few Pottons trying to clip you. After this, you will endure two rooms of Jamacys falling from the ceiling to go down the ladders like they're Donkey Kong barrels. Get down the ladders and dip back into the water, entering the door to the obligatory underwater Doc Robot, Bubble Man. Be careful with your jumps so Mega Man doesn't hit his head on deadly, flashy spikes! Use Shadow Blade or Spark Shock to take him down.
Needle Man's Stage (Revisited)[]

The shipyard at night. The first Doc Robot of this stage is Air Man, who is weak to Magnet Missile and Spark Shock. Be wary of his random Air Shooter patterns! The second Doc Robot fought is Crash Man. He won't attack unless you do, and he can be taken down with the Hard Knuckle or Top Spin, even the buster works for consistency.
Break Man[]
A mysterious robot appeared near Hard Man's mine that bears a striking resemblance to Proto Man. It is not clear whether Break Man and Proto Man are the same robot, however: apart from the slightly different appearance, they have completely different weapon weaknesses. (Break Man can only be defeated with the Mega Buster.) Moreover, Proto Man has 28 HP, while Break Man has just 24. However, if there is one major similarity, it is that Break Man acts exactly the same way as Proto Man.
Level Strategies: Wily Castle[]
It looks like Break Man and the Doc Robot incidents actually were distractions. Gamma is now missing from Light Labs! The only thing you can do now is infiltrate Wily's fortress and prevent him from using Gamma for evil. Good luck, Mega Man.
Wily Stage 1[]
With only a few bytes of map data to work with, we've determined that Wily Fortress III can be most efficiently entered through the sewers. Not the modern Municipal Sewers of Shadow Man, mind you, but the dank and ancient sewers of many years past, streching hundreds of miles underground... all the way to Wily's Lair. You'll still need to get past some of the outer battlements, but the network is so labyrinthine, you need to get as close as possible to the fortress to minimize the chance of getting lost in the sewers along the way.
Wily Stage 2[]
Wily Stage 3[]
Appears to be the Wily Castle's defense systems. Holograph Mega Mans.
Wily Stage 4[]
Rematch against the eight Robot Masters.
 --------------                          -------------
 | Needle Man |                          | Snake Man |
 --------------                          -------------

 --------------      ------------        -------------
 | Magnet Man |      | Mega Man |        | Spark Man |
 --------------      ------------        -------------

 -------------- ------------ ----------- --------------
 | Gemini Man | | Hard Man | | Top Man | | Shadow Man |
 -------------- ------------ ----------- --------------
Wily Stage 5[]
This area only consists of two rooms: one to fill up your weapons and the next one where you take on Dr. Wily, operating his third Wily Machine, the Pinbot. It's a two-part battle like most Dr. Wily battles. For part 1, the Pinbot will slowly walk left and right while firing electric bolts that move in a circular pattern. You need to destroy the cannon on the underside of the machine. Four hits from the Spark Shock will take it out and open the top hatch where you can now see the mad scientist himself. The attack pattern will also change a bit. Wily will now fire pellets down at you in an arc pattern and the machine will lower after each step left or right and try to crush you. Since the weak spot is so high up off the ground, Shadow Blade and Hard Knuckle are good weapons to use. But the best weapon for this part of the fight is...RUSH JET! That's right folks! Hop on Rush Jet and hover parallel with Wily and fire your Mega Buster at him. Since he has no invulnerability period, just keep firing and you will drain his energy rather quickly. This fight seems too easy, namely because after he's beaten, it's discovered that Dr. Wily merely placed a robotic decoy in the cockpit in place of himself Gamma is not far ahead...
Final Wily Stage: Gamma[]
The level begins in a room full of power-ups, So grab as much as you can (You'll need it!) and head through the mysterious door to the right. The super-robot Gamma is waiting and is ready to attack. When you're on the floor of the boss room, Gamma will fire pellets in an arc where you are standing, so keep moving. If you get up onto the higher platform, he'll fire three straight pellets left and right. Shadow Blade and Hard Knuckle are the weapons to use here. Once Gamma's health drops to half, the head will explode and Dr. Wily (the real one this time) will drop down and attach a new head onto Gamma's body and take full control of the giant robot. Now he will fire fast laser balls at you and a giant spike fist will run along the floor from the right side of the screen from time to time. Wily cannot be hit with most of the weapons this time around. The two weapons that work on him are Search Snake and Top Spin. When using Search Snake, jump off the high platform and fire a snake at the hole on top of the new head of Gamma. If it goes in, Wily takes a hit. When using Top Spin (this is the better weapon to use), jump towards Wily and start spinning. Keep pressing the B button upon contact to keep spinning and Wily will go down for good. As Wily begs for mercy (like he usually does) the castle will start to crumble. Wily will get crushed, but so will Mega Man. Afterwards, a blue, shadowy figure will show up wondering what became of Wily and realize he's already gone. Then, he'll break apart the boulder that fell on Mega Man and get him out of there. Following these events, it's discovered that it was in fact Proto Man that saved Mega Man's hide. Cue the end credits and the game is done.
All mission objectives complete. Congratulations, Mega Man! Return to Dr. Light's laboratory.