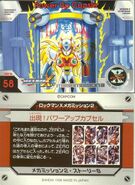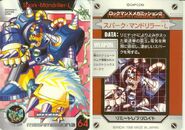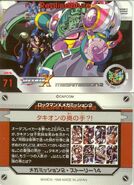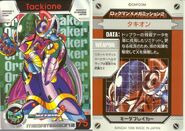
Rockman X Mega Mission 2 Carddass 100 display
Rockman X Mega Mission 2 (ロックマンXメガミッション2) also known as Rockman X Mega Mission 2: VS Revenge Limited, is the second part of the Mega Mission Carddass series, released in the first quarter of 1996 by Bandai. Set after the events of Mega Man X3, this side story continues the fight against Limited with the appearance of the Order Breakers.
Synopsis[]
(NOTE: Although the cards use the original names from Japan, this summary will use the English versions for the sake of clarity.)
Two months after the fall of Dopple Town, a new group of Mavericks calling themselves the Order Breakers appear. They are Tackione, Bloodione and Luxione, who were born from a surviving cell of Limited. With then are eight more Mavericks revived from Limited: Gravity Beetle, Blast Hornet, Chill Penguin, Neon Tiger, Spark Mandrill, Overdrive Ostrich, Magna Centipede and Crush Crawfish
While investigating an incident where all Reploids in an entire city turned Maverick at once, X battles the Limited Mavericks. However, he also finds himself struggling against the effects of the Order Breakers' Limited Field responsible for the Maverick outbreaks. The Limited Field causes a reaction on the remaining traces of Limited in the X-Buster, allowing X to use Special Weapons from his past against his enemies. However, after X defeats the first four Mavericks, the Order Breakers kidnap him.
While investigating the scene, Zero finds the remains of the X-Buster and uses those parts to remodel his own buster into the Neo Buster. Using this power to track down X, Zero faces the remaining Mavericks and receives a new armor from Dr. Light called the Energy Armor, which is further upgraded into the Neo Armor during the battle against Spark Mandrill. With this power, Zero penetrates the Limited Field and takes on the Order Breakers, defeating Bloodione and Luxione. Tackione then reveals to Zero that he infused X with a Limited shell called the Replicapture, which is controlling X's actions. Zero battles X and successfully destroys the Replicapture, but he is severely damaged in the process.
Tackione attempts to take advantage of the situation to strike both Hunters down; however, X fights back, forcing Tackione to transform into his gigantic Final Mode. Zero then transfers his remaining energy to X along with the Neo Armor, creating the Giga Armor. Using all of his built up energy, X finally destroys Tackione with a Giga Crush.
Card list[]
This list includes the title in the front and the back of each card, in that order:
- No. 43: X & ZERO / Rockman X & Zero
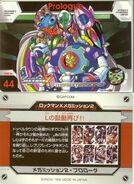
- No. 44: Prologue / Recurring Wave of L
- No. 45: Sonic-Ostreague-L / Sonic Ostreague Limited
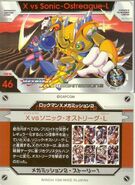
- No. 46: X vs Sonic-Ostreague-L / X vs Sonic Ostreague Limited
- No. 47: Gravity-Beetbood-L / Gravity Beetbood Limited
- No. 48: X vs Gravity-Beetbood-L / X vs Gravity Beetbood Limited
- No. 49: Scissors-Shrimper-L / Scissors Shrimper Limited
- No. 50: X vs Scissors-Shrimper-L / X vs Scissors Shrimper Limited
- No. 51: Icy-Penguigo-L / Icy Penguigo Limited
- No. 52: X vs Icy-Penguigo-L / X vs Icy Penguigo Limited
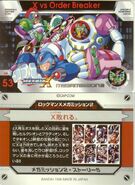
- No. 53: X vs Order Breaker / X Down
- No. 54: ZERO / Zero (Neo Buster)
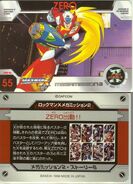
- No. 55: ZERO / Zero Scramble!!
- No. 56: Magne-Hyakylegger-L / Magne Hyakulegger Limited
- No. 57: ZERO vs Magne-Hyakulegger-L / Zero vs Magne Hyakulegger Limited
- No. 58: Power Up Capsule / Arrival!! Power Up Capsule
- No. 59: ZERO / Zero (Energy Armor)
- No. 60: Explause-Horneck-L / Explause Horneck Limited
- No. 61: ZERO vs Explause-Horneck-L / Zero vs Explause Horneck Limited
- No. 62: Shining-Tigerd-L / Shining Tigerd Limited
- No. 63: ZERO vs Shining-Tigerd-L / Zero vs Shining Tigerd Limited
- No. 64: Spark-Mandriller-L / Spark Mandriller Limited
- No. 65: ZERO vs Spark-Mandriller-L / Zero vs Spark Mandriller Limited
- No. 66: ZERO / Zero (Neo Armor)
- No. 67: Bloodione / Bloodione
- No. 68: ZERO vs Bloodione / Zero vs Bloodione
- No. 69: Luxione / Luxione
- No. 70: ZERO vs Luxione / Zero vs Luxione
- No. 71: Replicapture / Tackione’s Secret Weapon?!
- No. 72: Replicapture / Rockman X (Replicapture)
- No. 73: ZERO vs ROCKMAN X / Zero vs Rockman X (Replicapture)
- No. 74: ZERO vs ROCKMAN X / Comrades, Collide!
- No. 75: Tackione / Tackione
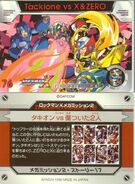
- No. 76: Tackione vs X & ZERO / Tackione vs the Damaged Duo
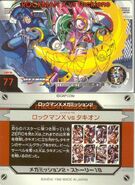
- No. 77: ROCKMAN X vs Tackione / Rockman X vs Tackione
- No. 78: Tackione – Final Mode / Tackione Final Mode
- No. 79: Tackione – Final Mode vs X & ZERO / Tackione Final Mode vs Double Heroes
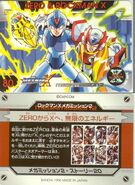
- No. 80: ZERO & ROCKMAN X / Zero to X, Infinite Energy
- No. 81: ROCKMAN X / Rockman X (Giga Armor)
- No. 82: X vs Tackione – Final Mode / Rockman X (Giga Armor) vs Tackione Final Mode
- No. 83: Giga Crush!! / Explosion! Giga Crush!!
- No. 84: ROCKMAN X vs Tackione / The Calm Before the Storm? An Eerie Silence.
Jumbo Carddass Chip Shooter[]
Jumbo Carddass Chip Shooter is a series of large cards that contain detachable chips (pogs). Like the main cards, their numbering continues from the Rockman X Mega Mission Chip Shooters. Cards 4 and 5 have 15 chips each, and card 6 has 9 chips and a "battle table" to place the chips.
| Card no. |
Chip no. |
Name | BP |
|---|---|---|---|
| 4 | 46 | ROCKMAN X | |
| 47 | ZERO | ||
| 48 | X & ZERO | 1200 | |
| 49 | ROCKMAN X | ||
| 50 | ROCKMAN X | ||
| 51 | ZERO | 720 | |
| 52 | ZERO | 680 | |
| 53 | S・Ostreague・L | 620 | |
| 54 | G・Beetbood・L | 680 | |
| 55 | S・Shrimper・L | 750 | |
| 56 | Bloodione | 880 | |
| 57 | Luxione | 850 | |
| 58 | ZERO vs Bloodione | 1400 | |
| 59 | ZERO vs Luxione | 1400 | |
| 60 | X vs Tackione | 1900 | |
| 5 | 61 | ZERO | 750 |
| 62 | ROCKMAN X | 540 | |
| 63 | Tackione | 1900 | |
| 64 | ROCKMAN X | ||
| 65 | ROCKMAN X | 2200 | |
| 66 | ZERO | ||
| 67 | ZERO | ||
| 68 | I・Penguigo・L | 580 | |
| 69 | M・Hyakulegger・L | 700 | |
| 70 | E・Horneck・L | 780 | |
| 71 | ZERO & X | 1940 | |
| 72 | Replicapture | 1400 | |
| 73 | ZERO vs X | ||
| 74 | X vs Tackione | 2000 | |
| 75 | ROCKMAN X | ||
| 6 | 76 | ZERO | 1400 |
| 77 | ROCKMAN X | ||
| 78 | Tackione Final Mode | 2000 | |
| 79 | S・Tigerd・L | 600 | |
| 80 | S・Mandriller・L | 780 | |
| 81 | Tackione Luxione Bloodione | 660 | |
| 82 | ROCKMAN X | 790 | |
| 83 | ZERO | 760 | |
| 84 | ZERO | 3630 |
Gallery[]
Trivia[]
- Although Zero obtains armor power-ups from Dr. Light in Mega Mission 2, it was later revealed in Mega Man X5 that Dr. Light cannot create an armor for Zero due to his lack of knowledge on Zero's systems (although Zero can store armor data for X to download later).
External Links[]
- The Reploid Research Lavatory: a blog with translations of all cards from the Mega Mission series.
| Rockman X Mega Mission | |
|---|---|
| Characters | |
| Rockman X Mega Mission | X • Zero • iX • Dr. Doppler • Curtiss • Schmitt • Mother Limited |
| Rockman X Mega Mission 2 | X • Zero • Tackione • Bloodione • Luxione |
| Rockman X Mega Mission 3 | X • Zero • Return iX • Enemice HL • Rot Armor • Blau Launcher • Grün Metamo • Braun Eleci • Σ Limited |
| Rockman X Mega Mission 4 | X • Zero • Grow iX • Himmel • Berg |
| Rockman X Giga Mission | X • Isoc • Saktira CC • Pranara DD • Nichts • Chaosbrahman Orochi |
| Armors | |
| Clear Armor • Replicapture • Energy Armor • Neo Armor • Giga Armor • iX Armor • R-iX Armor | |
| Miscellaneous | |
| Limited • Σ Chip • Gazelle Custom • Extreme | |


