- "Data-wise, I've surpassed you... There's no chance for me to lose!"
- ―High Max, Mega Man X6
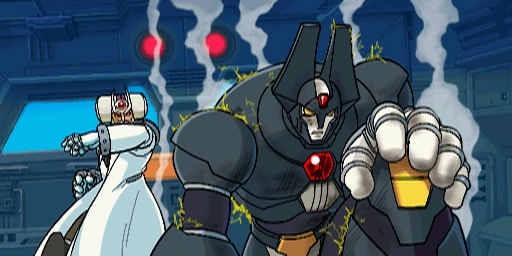
High Max, known as HI-MAX (ハイマックス Hai Makkusu) in Japan, is an antagonist from Mega Man X6. Created by Gate using data from Zero's DNA, he is the leader of the Nightmare Investigators, drawing other Reploids to join himself and Isoc with his impressive might.
Characteristics[]
High Max is a giant Reploid who towers over X, Zero, and even Isoc. He has black and white armor with yellow highlights. Like his creators, he possesses a white shape on his chest with a red gem, reminiscent of a formal shirt and tie under a suit jacket. He has pale skin and blank eyes, and his helmet possesses two horn-like structures and Gate's signature rhombus gem.
High Max is incredibly arrogant, and not without good reason. He is aware of his technological superiority over most other Reploids and confident in his combat abilities. This makes him a natural leader and symbol to rally around for the Nightmare Investigators. It also makes him a bully, as he was quick to humiliate X and call him pathetic in their first encounter. He retains a stoic demeanor at all times, only showing quiet frustration and surprise when he is defeated by the Maverick Hunters.
History[]
Mega Man X6[]
High Max was created by Gate using the data gained from studying Zero's DNA with Isoc. He was positioned as the head of the Nightmare Investigators, his immense strength ensuring the safety of any volunteers who would join them.[1] Given Gate's true plans, it's unlikely High Max had any intention of protecting volunteers from the Nightmare.
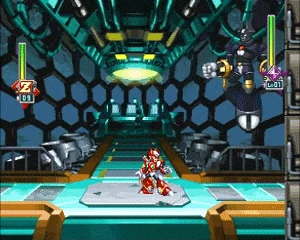
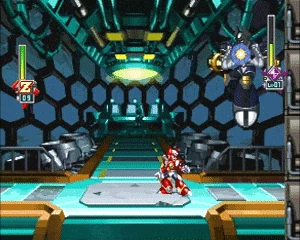
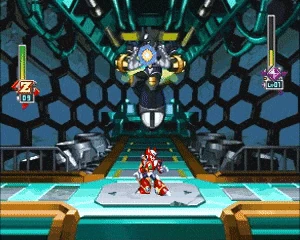
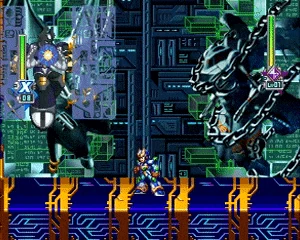
High Max first appears in the Opening Stage, having witnessed the Zero Nightmare land the finishing blow on the D-1000. This affirms his idea that Zero is behind the Nightmare, and when X challenges him on this, he asserts that X may be connected to Zero as well and attacks. He easily overpowers X, but lets him off with a warning to stay out of the investigation before departing.

High Max, if the player defeats him in an Another Route.
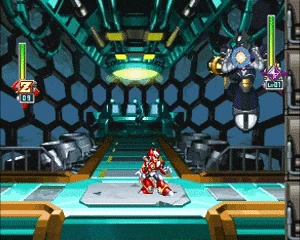
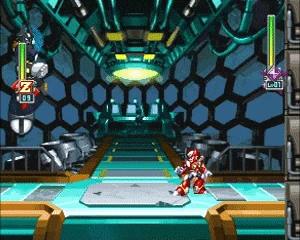
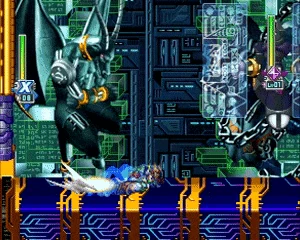
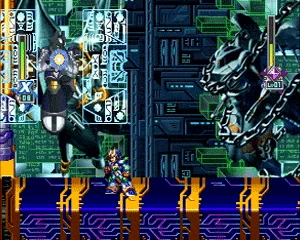
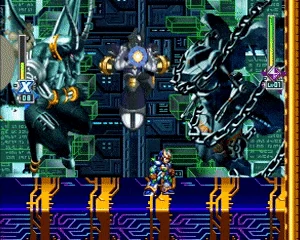
High Max can then be fought in any of the secret Another Routes, found via blue portals hidden in the game's eight stages. He again orders the Maverick Hunters to stay out of the Nightmare investigation, but when they refuse, he attacks. In these boss fights, High Max can be defeated strategically using the Nightmare Investigators' Special Weapons, though he still poses a major challenge. If X or Zero defeats High Max, Isoc will retrieve him and Gate will personally invite the Maverick Hunters to his Secret Lab, opening the final stages of the game early.
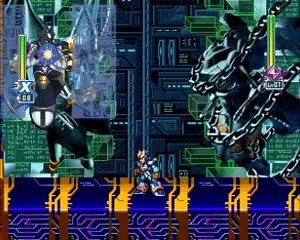
High Max reappears as the boss of the first half of Secret Lab Stage 2, attempting to stop the Hunters once and for all. He employs a slightly different strategy in this battle, but is defeated and destroyed for good.
Strategy[]
High Max is one of Gate's finest creations, a supposedly invincible Reploid, and his grueling boss battles reflect that. He remains airborne, launching blue energy attacks, and cannot be damaged by normal weaponry. X fails to defeat High Max in their confrontation in the Opening Stage, and must survive until he deems X no threat.
Another Route[]
Using a Special Weapon, the player can damage High Max in the rematch. With X, they must first hit him with a Charge Shot to stun him before striking with any special attack: a Special Weapon (Ray Arrow and Metal Anchor work well), or even Armor Parts abilities like Mach Dash and Engetsurin. The order is reversed for Zero: hit him with a Technique before dealing damage with the Z-Saber or Z-Buster (Ensuizan can both stun and damage him in one attack). This slow process can make the battle drag on for a while. Additionally, once High Max has 25% health, he desperately launches shots until the battle's end; in this phase he can be damaged by Special Weapons normally.
|
Cross Shot (クロスショット Kurosu Shotto)[2] |
|---|---|
| High Max shoots four energy balls at the player, usually three times in a row. | |
| Damage: 4:6:7 | |
|
Tackle Attack (体当たり攻撃 Taiatari Kōgeki)[2] |
| High Max summons blue rings around himself, defending from attacks, and swoops low at the player before exiting off-screen. This can be avoided by ducking in the corner. | |
| Damage: 6:8:10 | |
|
Death Break (デスブレイク)[Citation needed] |
| High Max charges an energy ball on his fist and flies forwards, striking the wall. | |
| Damage: 9:12:15 | |
|
Death Ball (デスボール Desu Bōru)[2] |
| High Max releases a large energy ball that crawls along the floor and up the wall. It can be destroyed, but doing so splits it into shots that fly at the player. He only uses this attack after losing 50% health. | |
| Damage: 9:12:15 | |
|
Death Ball Final (デスボール・ファイナル)[Citation needed] |
| High Max hovers to center of the room and creates energy balls that split into smaller projectiles. He uses this attack once he only has 30% health left, and does so until the end of the battle. | |
| Damage: 9:12:15 |
Secret Lab 2[]
High Max returns in Gate's Secret Lab with an altered strategy, now making use of rectangular barriers which complicate the Special Weapon pattern. The barriers can be destroyed, but doing so five times puts High Max into a desperate state where he casts energy balls until the end of the battle. Certain attacks, such as Blade Armor's Charge Saber or the Ultimate Armor's Plasma Charge Shot, can reach through his barriers.
|
Tackle (体当たり Taiatari)[3] |
|---|---|
| High Max summons two rectangular barriers at his sides and swoops low towards the player from off-screen. Unlike before, this attack can hit the player even if they are crouching in the corner. | |
| Damage: 6:8:10 | |
|
Crush Press (押し潰し Oshi Tsubushi)[3] |
| High Max casts his barriers off-screen. They then appear above the player to fall on top of them. | |
| Damage: 9:12:15 | |
|
Death Ball (デスボール Desu Bōru)[3] |
| High Max releases a large energy ball that crawls along the floor and up the wall. It can be destroyed, but doing so splits it into shots that fly at the player. | |
| Damage: 9:12:15 | |
|
Shot (ショット Shotto)[3] |
| High Max sticks his barriers together before casting it horizontally; as it flies, it shoots four projectiles at the player. He only uses this attack once he has lost 50% health. | |
| Damage: 9:12:15 (barriers), 4:6:7 (shot) | |
|
Death Ball Final (デスボール・ファイナル)[Citation needed] |
| High Max hovers to center of the room and launches large energy balls after the player. He performs this if the player destroys his barriers five times in a row, and does so until the end of the battle. | |
| Damage: 9:12:15 |
Quotes[]
In-battle quotes[]
| Action | Japanese | Translation | Audio |
|---|---|---|---|
| Cross Shot | 死ぬんだ!(Shinu n da!) | Die! | |
| Death Ball | デスボール!(Desu Bōru!) | Death Ball! | |
| After Death Ball | 無駄だ!(Muda da!) | It's no use! |
Other appearances[]
- High Max appeared as a boss in the X Special World in Rockman Xover.
- High Max appeared as a Unit card in TEPPEN.
- High Max acts as the boss of 3-3 alongside Vile MK-II in the X Challenge Vol.2, using his fight in Secret Lab 2. If X runs out or chooses not to take Special Weapons, the Z-Saber will be considered as one as High Max is otherwise invulnerable.
Gallery[]
")
")
")
")
")
")
")
")
Videos[]
 (24 KB)")
 (25 KB)")
References[]
- ↑ Isoc: "Now, I'd like to call on volunteers! Unite with us, and help our cause! Work for these eight investigators!! Our goal is to wipe out the Nightmare... and to delete Zero's ghost! Come together for our future!! This High Max will lead the mission. We guarantee your safety if you join us." - Isoc's speech, Mega Man X6
- ↑ 2.0 2.1 2.2 Boss File: High Max, Rockman X6. Compendium of Rockman X. pg. 98.
- ↑ 3.0 3.1 3.2 3.3 Boss File: High Max, Rockman X6. Compendium of Rockman X. pg. 100.
| Mega Man X6 | |
|---|---|
| Nightmare Investigators | |
| Commander Yammark • Ground Scaravich • Blaze Heatnix • Blizzard Wolfang • Rainy Turtloid Metal Shark Player • Shield Sheldon • Infinity Mijinion | |
| Other Bosses | |
| D-1000 • Zero Nightmare • Dynamo • Nightmare Mother • High Max • Gate • Sigma | |
| X's Special Weapons | |
| Yammar Option • Ground Dash • Magma Blade • Ice Burst • Meteor Rain • Metal Anchor • Guard Shell • Ray Arrow | |
| Zero's Special Techniques | |
| Yammar Option • Sentsuizan • Shoenzan • Hyoroga • Ensuizan • Rakukojin • Guard Shell • Rekkoha | |
| Armors | |
| - X - Falcon Armor • Blade Armor • Shadow Armor • Ultimate Armor - Zero - Black Zero | |
| Stages | |
| Opening Stage • Amazon Area • Central Museum • Magma Area • North Pole Area • Inami Temple • Recycle Lab • Laser Institute • Weapon Center • Secret Lab | |
| Miscellaneous | |
| Walkthrough • Another Route • Parts • Injured Reploids • List of Enemies Damage Data Chart (X) • Damage Data Chart (Zero) • Game Script (X's story) • Game Script (Zero's story) | |